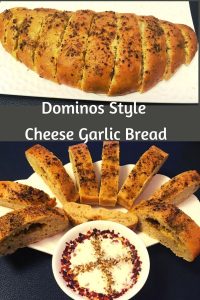
Dominos Style Cheese Garlic Bread With Wheat Flour is the best combo of health and taste. Garlic breadsticks filled with cheese becomes irresistible.
You can make this without cheese too and shape it like GARLIC ROLLS which again is a great party starter.
Make this bread in microwave convection or Otg or AIR FRYER.
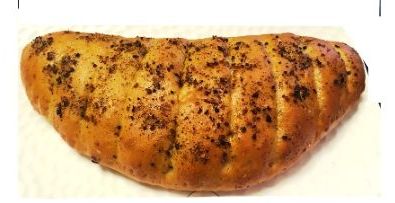
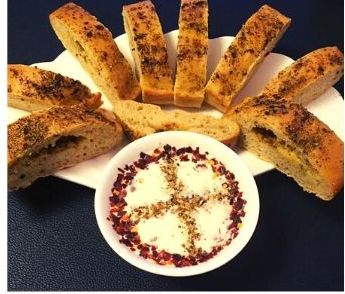
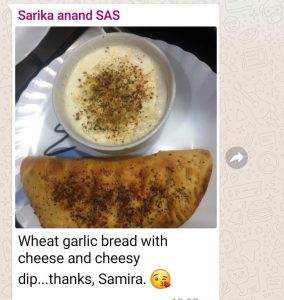
Garlic Bread is loved by one and all. The aroma of garlic with cheese is itself intoxicating. And if it's from Dominos then nothing like it. Whenever we order pizza from Dominos then there has to be at least one garlic bread in it. The semi-circular Garlic bread with a cheesy dip makes your day.
So, when I started baking bread at home, then this garlic bread had to be tried. I tried it and soon it became a regular at my place.
When you make this garlic bread at home then you don't have to tell anyone that you have made this. The whole house automatically comes to know that it is being made.
I am on cloud nine when my son, on returning home from the office, says at the gate itself, "Mom, you have made garlic bread today... Yayyyy."
Garlic Bread With Wheat Flour
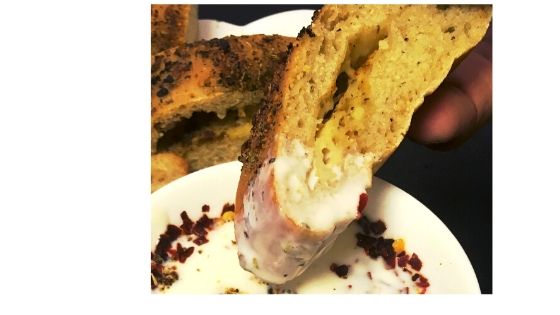
Dominos Garlic bread is made with all-purpose flour but this one I have made using both wheat flour and all-purpose flour, half of each. But the softness and taste remain the same. As you can also see in the pics, the perforation and the texture speaks for itself.
I would like to share here, that after this I have made garlic bread using 100% whole wheat flour too and the results have been excellent. If you want to avoid refined flour then check my GARLIC ROLLS recipe where the dough is being made with whole wheat flour only.
With Instant Yeast
I have used Instant yeast here which can be directly added to the flour. No need of proofing in water first.
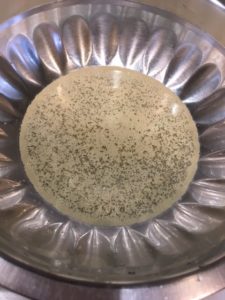
But I still proof it in warm water. Apart from giving me the assurance that it is good, it also gives me some sort of happiness seeing that frothy, bubbly water. Also, when the yeast is being proofed, I do my other preparations like sifting flour, chopping garlic etc.
So, if using instant yeast, you can do it, either way, add directly to the flour or first proof it in warm water.
To know about different TYPES OF YEAST read here.
Serving Suggestions
- It is one bread you can have any time of the day be it breakfast or lunch or dinner.
- You can pack these in your children's lunch box and they will be the happiest ones.
However, if you have a sweet tooth, then do try these sweet loaves of bread made with orange marmalade and Nutella: ORANGE BABKA BREAD or CHOCOLATE BRAIDED BREAD
Tips For The Perfect Outcome
- Seal Properly: While folding it, as you will see in the recipe, take care that the edges are sealed properly. If not sealed properly then its shaping will be distorted and also the cheese will spill over.
- For sealing you can use any method like pressing it with thumb or with a fork or folding the edges. Whatever method you choose just to ensure that it is done properly.
- Slashing: Also, before baking, slash it, which means make cuts with a serrated knife. This is to ensure that steam passes out while baking otherwise it may burst open.
- For information regarding yeast and its varieties, check my post All About Yeast.
- For understanding the basics of bread making like kneading flour, poke test etc, check my post, Basic steps Involved In Bread Making.
It's a very long post, please go through it at least twice and follow steps to get the desired result.
Step By Step Recipe
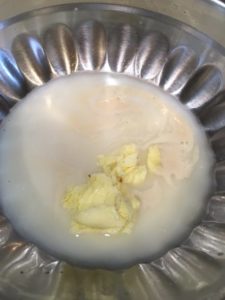
- Take warm water in a big bowl, add sugar and yeast, instant or dry. Cover it.
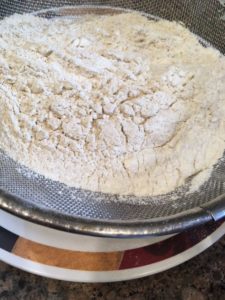
- Sift wheat flour, all-purpose flour and salt
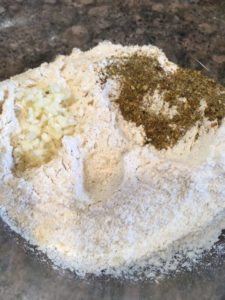
- Add oregano/mixed herbs, chilli flakes, crushed garlic to the flour.
- When the yeast becomes frothy and bubbly, add butter and milk in it.
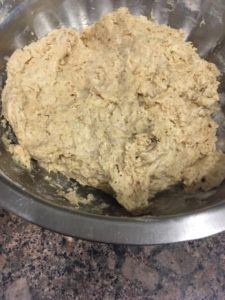
- Add flour in 2 or 3 instalments, mixing after each addition.
- When mixed, leave it for 8 to 10 minutes, covered.
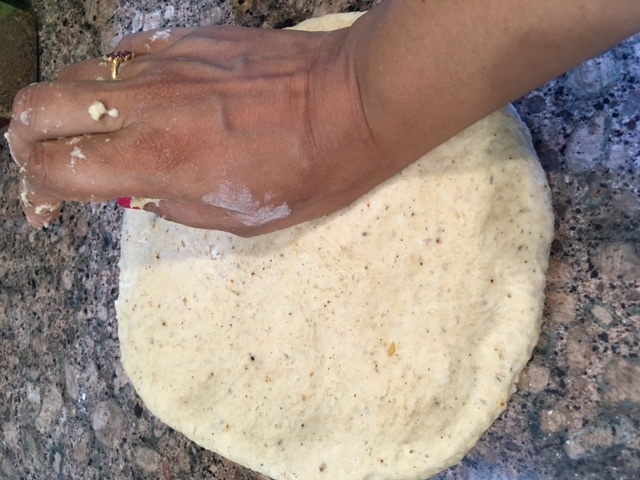
- Knead the flour with the heel of your hand or fist. Knead till the dough becomes soft and smooth.
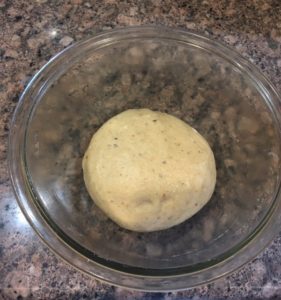
- When kneaded properly, keep in a greased bowl, flip.
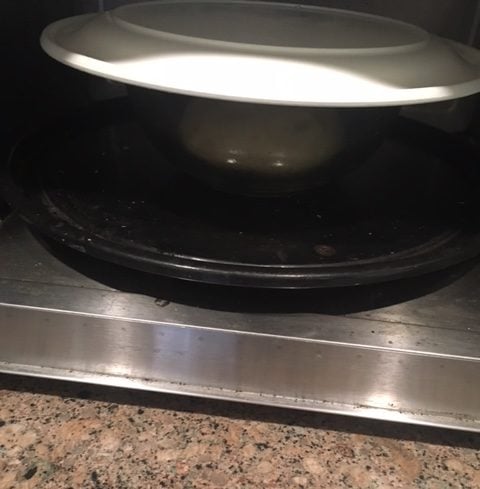
- Cover the bowl and let it rest in a warm place for 40-45 minutes or till double in size.
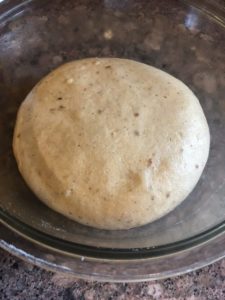
- When doubled, deflate and knead just for 20-30 seconds.
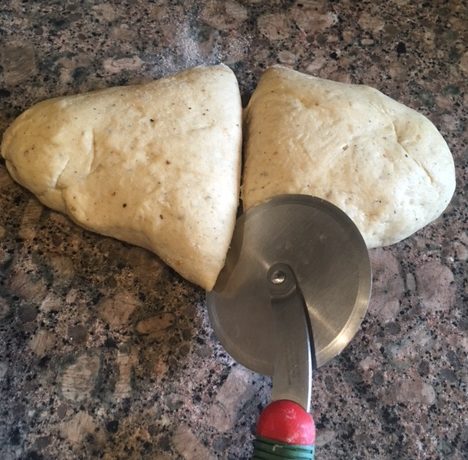
- Divide the dough into 2 equal parts.
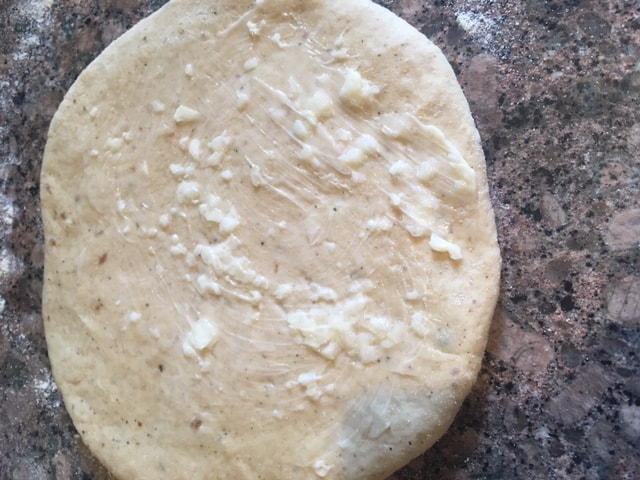
- Sprinkle flour on the kitchen platform, put one part and roll and spread garlic butter on it.
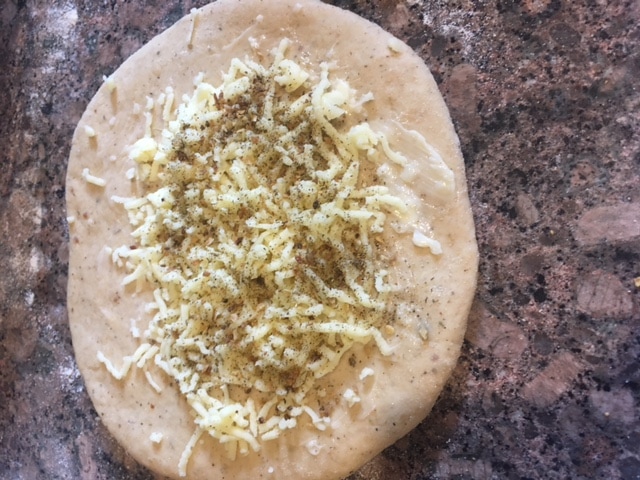
- Grate pizza cheese on it and sprinkle herbs etc.
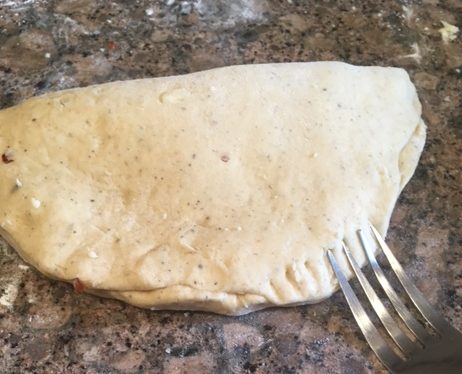
- Fold in half, seal edges, either pinching motion or with a fork.
- Keep it on the baking tray. Repeat with another part of the dough. Keep distance between the two loaves of bread.
- Cover with a damp cloth. After 30 minutes, preheat the oven for 10 minutes.
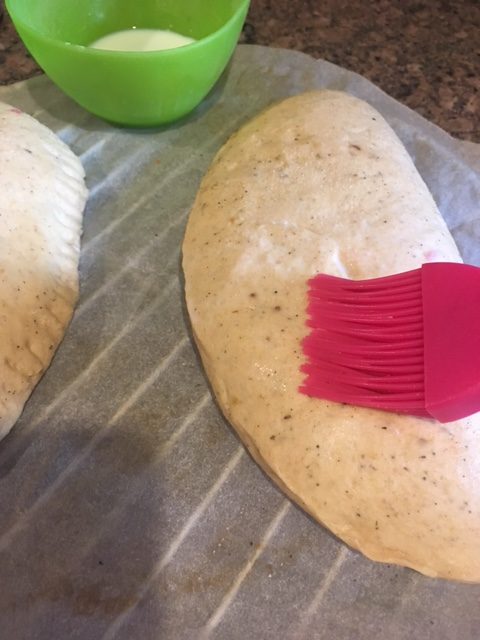
- Milk wash the bread.
- Sprinkle Herbs and Make cuts.

- Bake for 20-25 minutes. Brush with butter.
- Serve with love, cheesy dip optional.

In Air Fryer
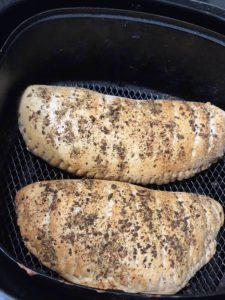
- Make sure that you keep the size that fits in the air fryer.
- Take out the air fryer basket and after shaping the garlic bread, keep it straight in it for proofing. This is because once proofed it is difficult to lift it.
- Preheat the air fryer at 180 degrees for 5 minutes.
- Brush the garlic bread with milk, slash it and sprinkle herbs.
- Keep the basket back in the air fryer and bake for 20 minutes approx.
FAQs
Q) Can I make it ahead of serving time?
- It takes approximately 2 hours to make including the two rising times as well the baking time of 20 minutes.
- You can reduce this time by kneading the flour and keeping it in the refrigerator for at least 8 hours and maximum up to 3 days. In the refrigerator, it will have a slow rise which is all the more good. Then in the morning (or evening depending on when you kept it), take out, punch down the dough. Shape it, leave it for half an hour and bake. So, your breakfast will be ready in about an hour.
Q) What is the shelf life of this bread?
Remains good for a day or two at room temperature. For longer storage, keep in the refrigerator.
Q) I have dry active yeast. How much to use it then?
In that case, you need it slightly more than instant yeast. Take 3/4 tsp for this recipe.
Q) Which cheese is to be used for stuffing?
For the filling, use any pizza cheese.
New To Bread Baking?
If you are new to bread making or have some inhibitions in using yeast, then my suggestion is that you first go through the basics by reading ALL ABOUT YEAST and BASICS OF BREAD MAKING.
However, if you are friendly with yeast then forget the above posts and dive straight into the recipe below.
And still, if you are not comfortable in using yeast then try these easy PIZZA MUFFINS. These muffins are made without yeast and the best thing is that very little cheese is used in this. A perfect healthy option to have in the breakfast. Try it!
Cheese Garlic Bread Dominos
Make your own Dominos style garlic bread that too healthily
My Cup Measures 240 ml
For Dough
- 1 Cup 130 gms Wheat Flour
- 1 Cup 120 gms All-Purpose Flour
- 1/2 tsp Instant Yeast (See Note 1)
- 3/4 tsp Salt
- 3 Cloves Garlic, Crushed
- 3/4 tsp Sugar
- 3/4 Tbsp Butter, Melted
- 1/2 Cup 100 ml Water, Warm
- 1/2 Cup 100 ml Milk, at room temperature
- 1 tsp Oil
- 1 tsp Oregano/Mixed Herbs
- 1 tsp Chilli Flakes, Optional
For Filling
- 1/2 Tbsp Garlic Butter (See Note 2)
- 60 g Pizza Cheese
- 1 tsp Oregano/Mixed Herbs
- 1 tsp Chilli flakes
- 1 tsp Milk
For The Dough
- Take warm water in a big bowl, add sugar and instant yeast. Cover it and leave it for 10-15 minutes. During this time, do the following preparations.
- Sift both the flours and salt at least 2 times. (See Note 3)
- Add crushed garlic, oregano and chilli flakes to the sifted flour and mix properly. Rub with your hands to ensure even distribution of garlic in the flour.
- When the yeast water becomes frothy and bubbly, add milk and butter to it.
- Now, add flour to this water in 2 or 3 batches, mixing well after each instalment.
- Knead the flour for 10-15 minutes. (See Note 5)
- Take a greased bowl. put the dough in it and then invert the dough so that the greased side comes on the top. This is important or else the dough may dry up and form cracks while rising.
- Cover the dough with a plate or clingfilm and leave it to rise for 45 minutes to 1 hour or till it doubles in size. (See Note 7 and 8 )
- Time to knock down the dough. The term knockdown means to deflate the dough and knead lightly for 30 seconds or so.
Shaping Garlic Bread
- Divide the dough into 2 equal parts.
- Sprinkle dry flour on the kitchen counter, put one part of the dough, roll it, about 1" thick, in a circular shape using a rolling pin or just with your hands. (See Note 9)
- Apply garlic butter, and spread out grated cheese on it. Take care that it remains away from the edges.
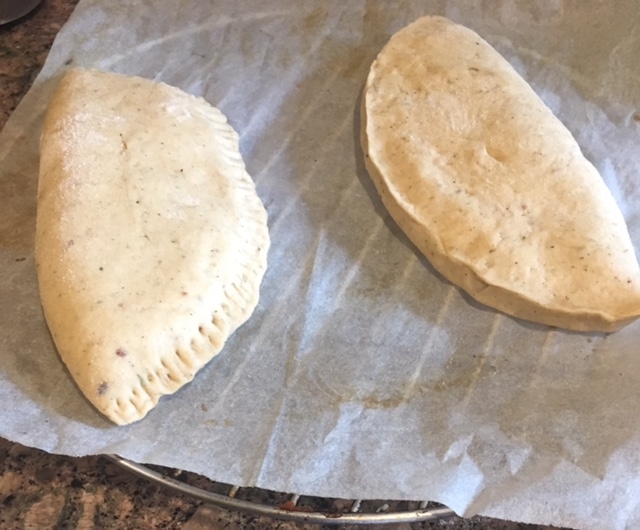
- Fold it into a half, giving the shape of a semi-circle.
- Press the edges and seal them through a fork or pinching motion.
- Put this on the baking tray, either greased or lined with parchment paper.
- Repeat the same process with the other part also.
- Keep distance between the breads as they will rise and expand during the rising time.
- Cover these with a damp cloth and leave for 30-40 minutes.
- After 30 minutes, start preheating your oven. Preheat it to 190 degrees C for 15 minutes.
- Milk Wash... Before keeping in the oven, milk wash your breads. It simply means brushing milk on the bread. (See Note 11)
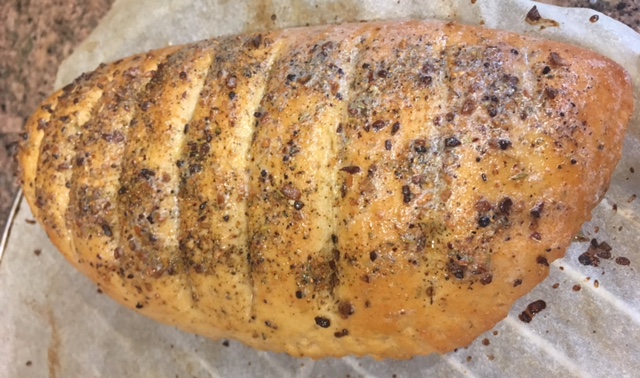
- Make cuts in the bread. Do not cut fully, just up to three-fourth only. Sprinkle oregano/mixed herbs.
- Bake at 190 degrees for 25 minutes.
- Once done, take out from the oven, keep it on a wire rack to avoid getting soggy from the bottom.
- Brush it with melted butter.
- Cut n serve n enjoy.
- For storing, after brushing with milk, cover it with a damp cloth and let it cool completely.
- When cooled, cut pieces and store in an airtight container.
Remains good for a day or two at room temperature. For longer storage, keep in the refrigerator.
- If using dry yeast then take 3/4 tsp of it.
- To make garlic butter, mix 1/2 tbsp butter and 1/2 tsp crushed garlic. If too cold, then take slightly melted butter.
- Sifting is done for many reasons. Apart from the flour getting aerated, it mixes the two flours properly and then also to incorporate salt into the flour. Because yeast does not like salt and if comes in direct contact of salt, its activity may be hampered.
- In case, the dough is too wet, add 1 or 2 tablespoons of either wheat flour or all purpose flour. This may happen due to the difference in various types of flour.
- When the whole flour has been added and mixed, it will be very sticky. Cover it and leave it for 8-10 minutes. Now, gather it, toss the dough between your hands for 3-4 minutes. It will stop sticking. Start kneading. Knead it for 5-7 minutes or till the dough stops sticking to your hands and to the bowl.
- For kneading, sprinkle very little flour on the kitchen platform, put the dough there, press it with the heels of your hands at different places. when spread then folds it and again start pressing. Do this for about 4-5 minutes till the dough becomes smooth, shiny and clears the poke test. If you poke a finger in the dough, it will spring back. Also, if you hold the dough in your hand then it will be firm and not sagging.
- Rising time depends on the quantity of yeast and on the weather conditions. During summers it may rise in 45 minutes to 1 hour. Whereas in winters it may take even up to 2 hours. Then perform the ripe test, poke your two fingers up to your knuckles in the dough. Pressed fingers should leave a dent that rebounds slowly.
- After rolling, before putting the filling, check that you can lift it without sticking to the counter. If it sticks, dismantle it, put more dry flour and then roll again.
- It is covered with damp cloth at different stages so as to prevent drying it out.
- Brushing with milk helps in getting the golden-brown crust.
- Adjust the quantity of garlic as per your liking.
- You can avoid spreading Garlic Butter if you do not want. In that case, after rolling the dough, grate cheese and fold it. Skip cheese if not interested.
- For adding instant yeast directly to the flour, add it after adding garlic etc to the flour and knead using warm water and milk.
You may PIN Domino Style Garlic Bread Recipe to try later:
Testimonials
Published 27th June 2017 Republished 8th July 2020
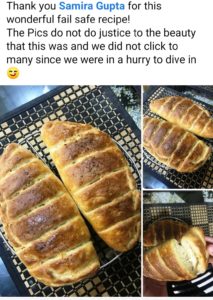
Hi Samira,
The recipe is perfect…who doesn’t like garlic bread…I have made it a few times and also tried a variation…I added capsicum-onion-corn stuffing too…it’s simple awesome.
Hi Sarika, Thanks for trying it out with a healthy and interesting twist.
Hi Samaira,
I tried making the garlic bread last night. While the dough rose so well both the times, the garlic bread was hard post baking. The inside was ok but not soft. Y do u think this happened ?
Hi Sudha… as u said the dough rose well both the times still was nit soft then the possible reasons could be…
Firstly either over baked.
Or, after taking out of the oven we need to brush it with butter, for shine and then cover it with damp cloth atleast for few minutes. Then cut.Like I made pav(buns) the other day, had them warm only but covered first with the damp cloth for 5 to 6 minutes.
Also, sifting is very important especially when using whole wheat flour. This is because it is v dense so to make it light it is sifted 3 to 4 times.