Indian style Pita Bread recipe with all the tips so that it puffs up with perfect pockets every time.
Pita, the famous flatbread of Mediterranian Cuisine, eaten with HUMMUS and FALAFEL is enough to put a smile on the faces of your loved ones.
Apart from being simple and sought for, the best part is that it is healthy too as I have made this with wheat flour instead of regular refined flour.
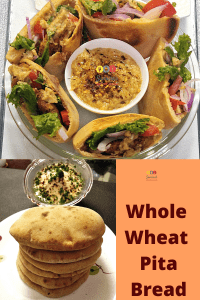
Hummus in Pita Pockets
For those who don't know Pita Bread, you might wonder, what's great about it. It is with all the goodness of chapati but still with many differences definitely. Years back even I didn't know about it. But whenever we passed through a good bakery, my hubby always picked up 1 or 2 packs of Pita Bread. And then back home, we would have it with hummus. I said good bakery as it was not commonly available then and only some upper-class bakeries stocked it. However, now things have totally changed and these are available everywhere.
Seeing the craze for this bread I too did my research on it and gave it a try. The initial few trials were not so great but thereafter it has been a breeze. Now no more store-bought Pitas in our house. And whenever I make it its enough to put a smile on everyone's face. Even you won't buy it after trying this one as it tastes so good. Much better than the readymade ones.
However, if you have a sweet tooth, then do try these sweet loaves of bread made with orange marmalade and Nutella: ORANGE BABKA BREAD or CHOCOLATE BRAIDED BREAD
Before we proceed further, What is Pita Bread?
In most simple words, Pita is bread with pockets.
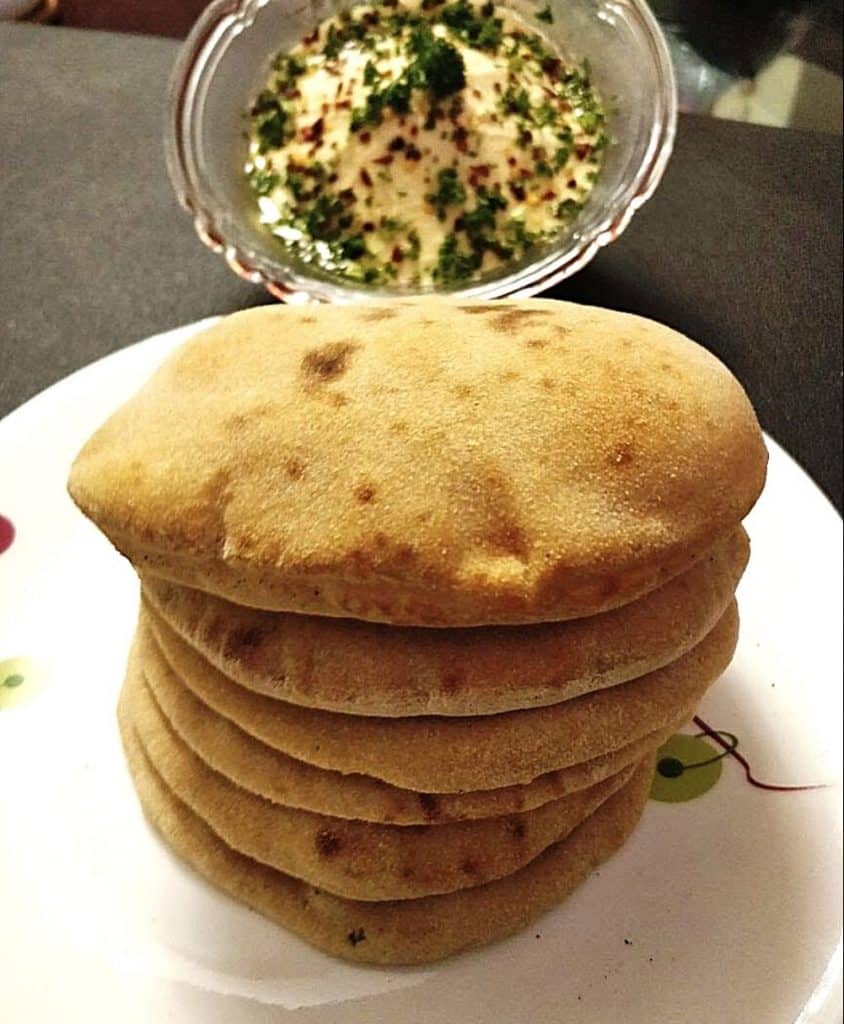
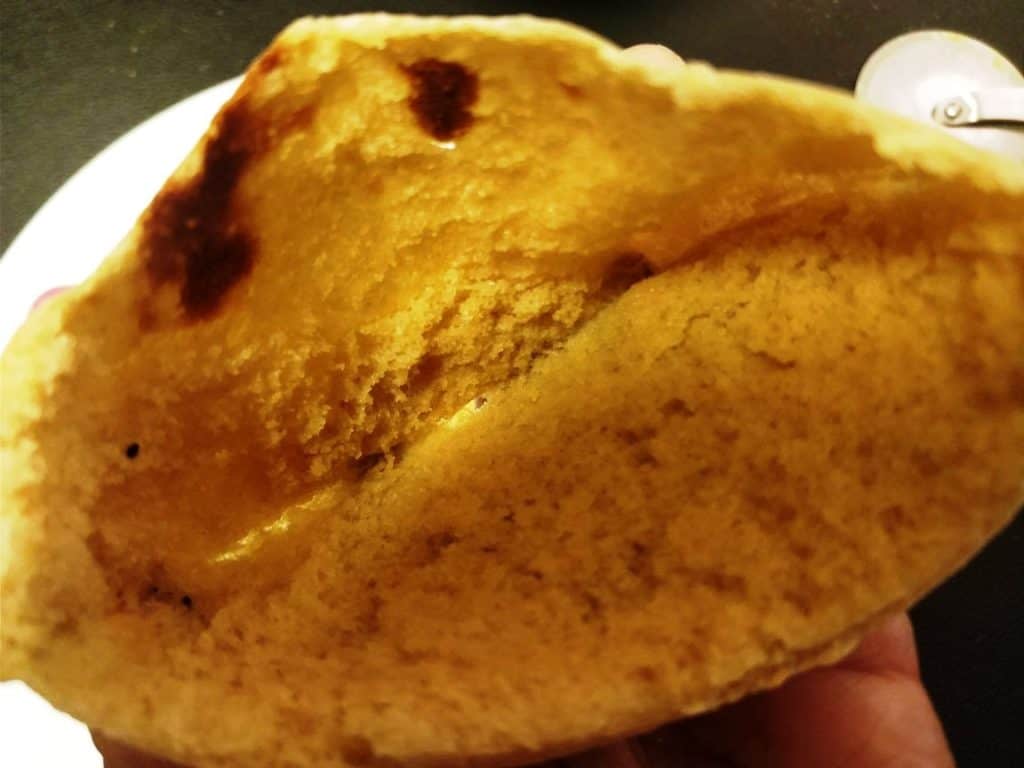
It is a flatbread, leavened with yeast and is commonly eaten in Greece, Italy, Persia and other Mediterranian countries. It puffs up so much that when divided from between, it shows up perfect pockets which are then filled with hummus, falafel and raw veggies.
Pita is cooked or baked at very high temperature so that the moisture in the dough turns into steam which eventually puffs up the bread. It is so well puffed that even after it is cooled, the upper and lower layers remain detached and we are able to get perfect pockets.
And when Pita puffs up it looks exactly like our desi Chapati or Phulkas.
How To Make
Pitas can be baked in an oven or on a skillet on the gas stove. Since my oven is small and holds only 2 pitas (even 1 at times) at a time, therefore, I use both modes simultaneously. That makes the work much easier and faster for me. On the skillet, it's just like we make chapatis. But in the case of an oven, ensure that it is preheated well. Preheat it to the maximum degree in your oven for a good 15 minutes.
With Instant Yeast
This time, like in my Wheat Pizza recipe, I have added yeast directly to the flour and then kneaded it. Yes, you can add it directly to the flour only if it is instant yeast and secondly if you are sure that the yeast is good. If in doubt, then activate it first in warm water and then knead the flour with it. For more details regarding it you may refer my post on PIZZA ROLLS.
Tips to Roll Pita
- See that there is no tear or crack in the rolled pita otherwise, steam will escape from here and your pita will not puff.
- Secondly, do not roll too thin. Should be slightly thicker than chapati.
- Thirdly, do not roll too big in size (diameter).
- And lastly, ensure that the oven is very hot.
Step By Step Recipe
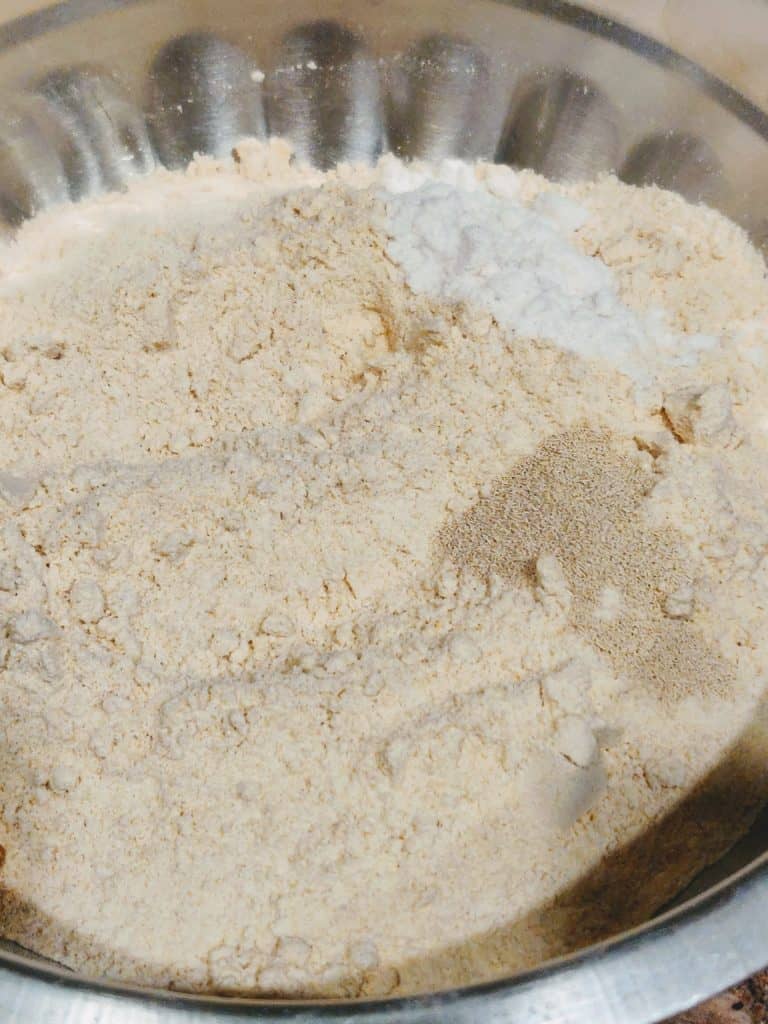
- In a big bowl, take both the flours, salt, and yeast. Whisk it nicely.
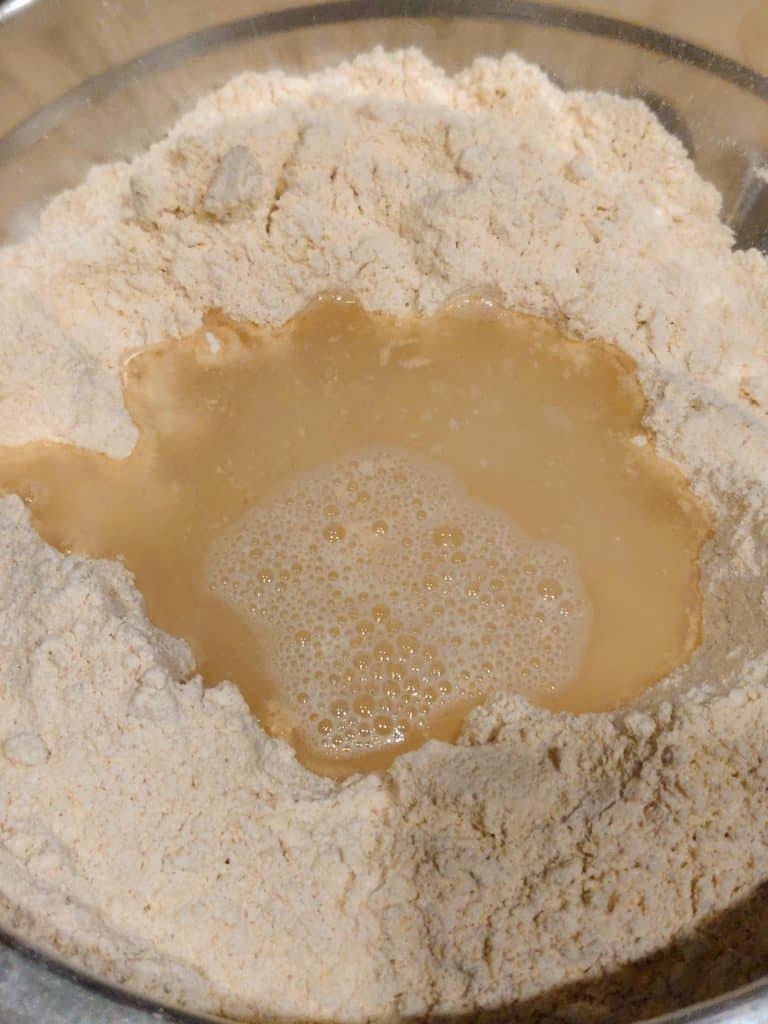
- Add honey to lukewarm water and knead the flour with this water. Water should be lukewarm wherein you can put your fingers comfortably. Too hot water will kill the yeast and if not sufficiently warm then the yeast will not activate.
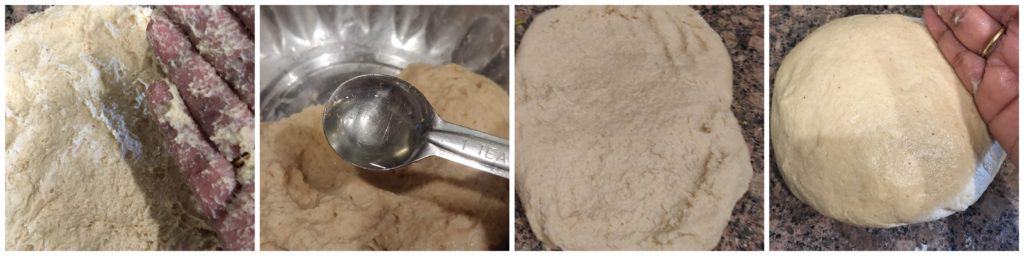
- Once gathered into a dough, add oil and just keep on pressing the dough with the back of your hand (knuckles) and after about 7 to 8 minutes it will stop sticking. Put the dough on your kitchen counter and knead for another 4 to 5 minutes. Stretch the dough using the heel of your hands, fold it, then again stretch. Soon the dough will be smooth and shiny.
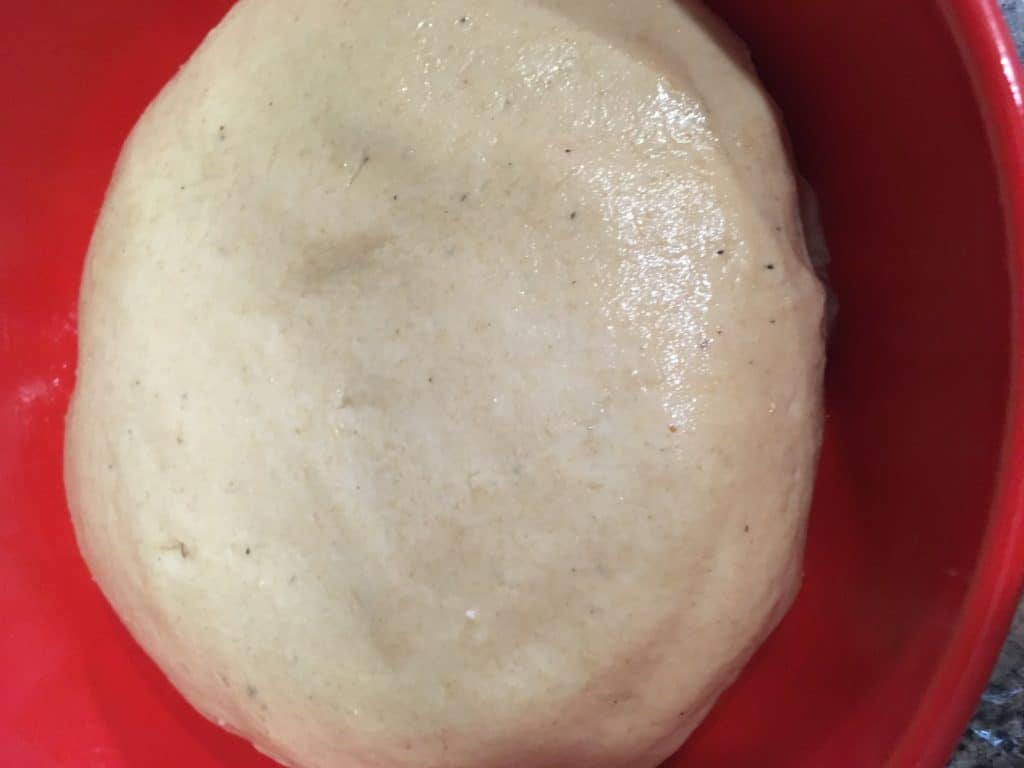
- Grease the bowl liberally, put the dough in it, invert the dough so that the top also gets oily. Cover it with a plate or lid and let it rise for an hour or so till doubles in volume. Time is just a rough guide and will depend on the weather. If too cold then it may take even longer. So, instead of time, watch your dough. To understand more about working with yeast, read here.
After Kneading
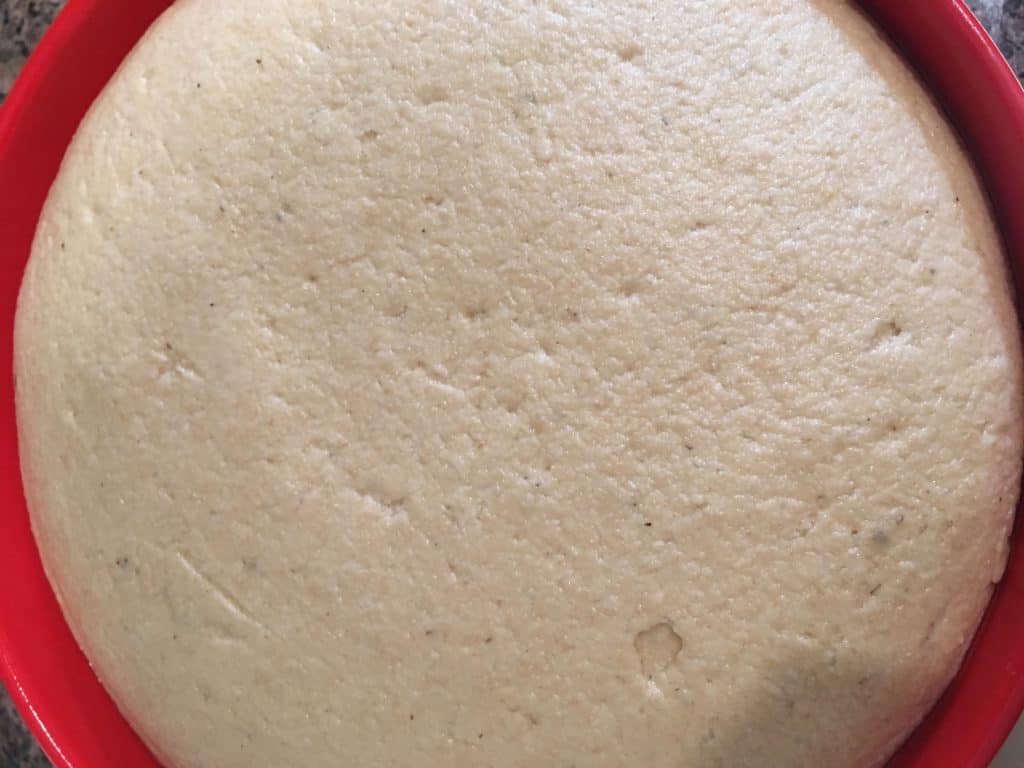
After The First Rise
- When the dough has risen, punch it to release the gases. Knead it lightly for a few seconds. Be gentle with the dough as we don't want to destroy the gluten developed therein.
- Divide it into 2 parts. Take one part, roll it into a log and divide it into 6 or 7 parts. You may eyeball it or use a weighing scale. For the first-timers, the ball should weigh around 75 gms. Make all the balls, cover them with a kitchen towel and leave them for second proofing for about 15 minutes.

- Start preheating oven along with the baking tray. Preheat it to the highest temperature in your oven for at least 15 minutes. Like in my oven, the highest temperature is 225 degrees C. You may even heat a skillet side by side if want to bake on both.
- Now, start rolling each ball just like your chapati, using dry flour.
- When the oven is well preheated, sprinkle little flour on the hot baking tray and put the rolled Pita on it. Flour is sprinkled so that the Pita doesn't stick to it.

- After a few minutes, you will see the Pita puffing up. When it is fully puffed up and changes colour slightly then take it out.
- Similarly, make all other Pitas. Pitas when baked in the oven, remain more or less white but we prefer the ones with brown spots. And, if left for too long in the oven then they get hard. So, at times, after taking out of the oven, I put it on the direct flame on the gas stove for 2 to 3 seconds and that's it.
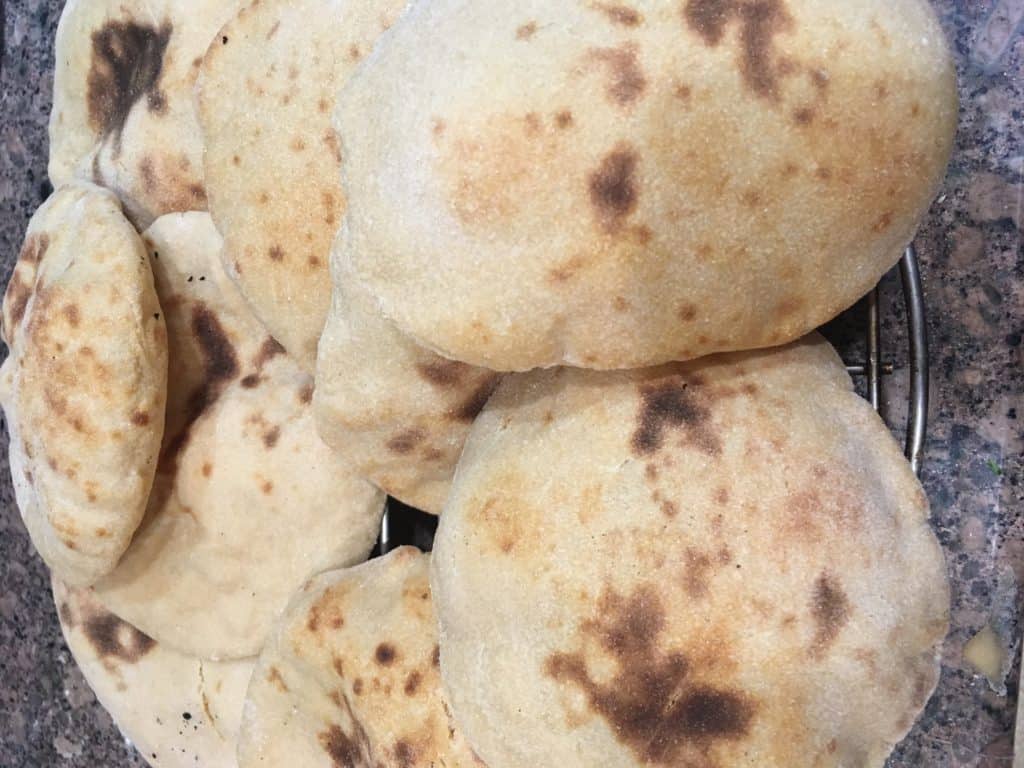
- Once out of the oven, stack them and wrap in a kitchen towel or aluminium foil. Heat trapped in it will keep the pitas soft.
- Once cooled completely then you can wrap these in aluminium foil or a ziplock bag and keep in the refrigerator too.
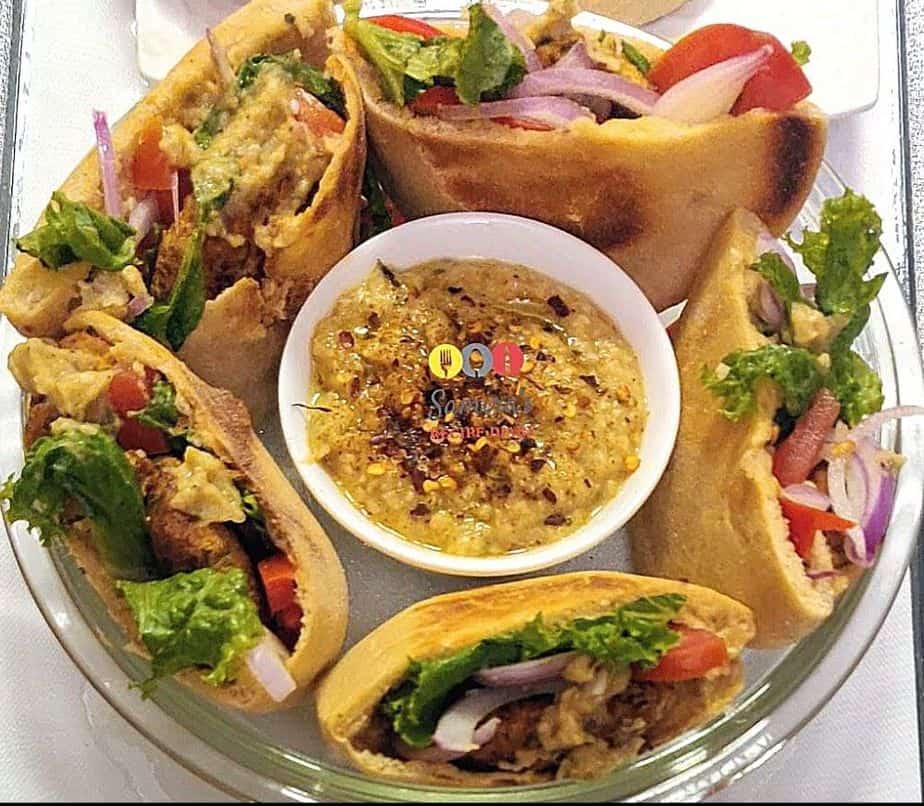
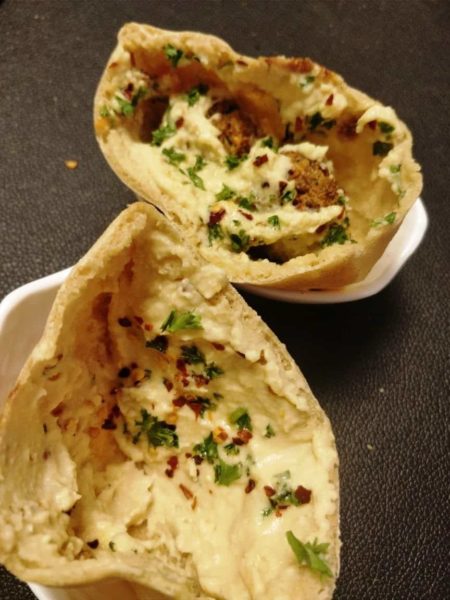
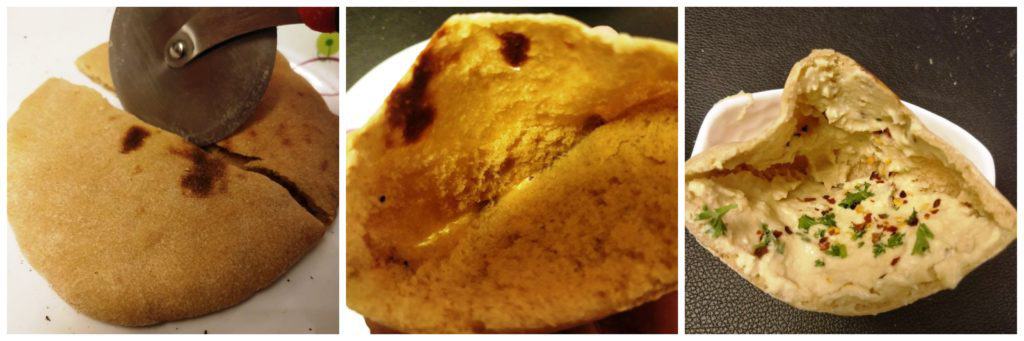
- At the time of serving, reheat it in the microwave or on a hot skillet. Cut it from the centre, you will see the hollow pocket. Fill it with a filling of your choice, preferably hummus, falafel and raw veggies like lettuce, onion etc.
FAQs
Q) How to serve Pita Bread?
- Pita is served with HUMMUS, a dip made with chickpeas and garlic and FALAFEL.
- Also, it can be served in sandwich style by stuffing hummus, falafel and veggies.
Q) Can I Make-Ahead this?
Yes, you can very well make these much ahead of time, as pockets remain intact. At the time of serving, just reheat them slightly and fill them with your choice of fillings.
Q) How to ensure that my Pita remains soft and not hard?
Once out of the oven, stack them and wrap them in a kitchen towel. Heat trapped in it will keep the pitas soft. Once cooled completely then you can wrap these in aluminium foil or a ziplock bag and keep them in the refrigerator too.
Q) Why my Pita does not puff up?
This can happen due to any of the following reasons:
- If there is any tear or crack in the rolled pita
- If it is rolled too thin. Should be slightly thicker than chapati.
- Thirdly, if it is rolled too big in size (diameter).
- And lastly, if the oven is not very hot.
Q) If Pita Doesn't Puff-up, then what to do?
- First of all, you can still have it as it is like chapati, the only thing is that it may not have pockets.
- Or make Pia crackers. For making crackers. cut it into wedges, apply oil, sprinkle seasoning and bake for few minutes till crisp.
- Thirdly, you can use it as a pizza base. The choice is yours.
Q) Can I replace whole wheat with refined flour?
Yes, you can! Recently I added little semolina too and the result was excellent. The taste and puffiness both increased manifold.
Still, if you want, you can opt either for all-purpose flour or a combination of all three flours. Everything will remain the same except the quantity of water as all-purpose flour absorbs much less liquid. Just take care of this.
Q) What is the difference between Pita and Chapati?
| Pita | Chapati |
| Mediterranean cuisine | Indian cuisine |
| Leavened with yeast | Not at all leavened |
| Served with Dal (lentils)or veggies | Served with hummus and/0r falafel |
| May or may not be smeared with butter | Not smeared with anything |
| May be made with refined flour or wheat flour | Made with wheat flour only |
Q) What is the difference between Pita and Naan?
Now, I am sure the next question which might be popping in your mind is then are Naan and Pita same, as both are leavened with yeast? So, the answer is No. Then how are they different?
| Pita | Naan |
| It is round in shape | It is oblong or triangular |
| Made with flour, yeast, salt, water and oil. | It also has butter and yogurt along with flour, yeast salt and water. |
| It is not smeared with butter | May or may not be smeared with butter |
| It has pockets that are filled with hummus or raw veggies thus turning it into a sandwich | No pockets are there. |
- You can read here more about this.
New To Bread Baking?
If you are new to bread making or have some inhibitions in using yeast, then my suggestion is that you first go through the basics by reading ALL ABOUT YEAST and BASICS OF BREAD MAKING.
However, if you are friendly with yeast then forget the above posts and dive straight into the recipe below.
In case, you are looking to bake pizza or kulcha without yeast then you may refer any of these posts:
Let's Connect!
I hope you have liked this Indian style Pita Bread recipe with Whole Wheat then do try it out for your loved ones. I will be happy if you share your creations on Instagram and tag me #samirasrecipediary there.
Thank you for reading this post. If you have liked this recipe then do let me know by leaving a comment below. Your feedback fuels my enthusiasm. You may share this post with your dear ones by clicking on the little buttons below. You may follow me on Facebook Pinterest Quora too. for latest recipe updates. Thank you!
Pita Bread Recipe Indian
Recipe whivh will give you perfect pockets every time
- 2 Cups (250 g) Wheat flour (Atta)
- 1 Cup (200 g) Fine semolina
- 1 Teaspoon Salt
- 1 Teaspoon Honey
- 3/4 Teaspoon Instant Yeast
- 4 Teaspoon Oil
- 1 and 3/4 Cup Lukewarm Water
In a big bowl, take both the flours, salt, and instant yeast. Whisk it nicely.
Add honey to lukewarm water and Knead flour with it.
It will be very sticky. Add about 2 teaspoon oil and just keep on pressing the dough with the back of your hand (knuckles) and after about 7 to 8 minutes it will stop sticking.
Put the dough on your kitchen counter and knead for another 4 to 5 minutes. Stretch the dough using the heel of your hands, fold it, then again stretch. Soon the dough will be smooth and shiny.
Grease the bowl liberally, put the dough in it, invert the dough so that the top also gets oily. Cover it with a plate or lid and let it rise for an hour or so till doubles in volume. Time is just a rough guide and will depend on the weather. If too cold then it may take even longer. So, instead of time, watch your dough
Once proofed, deflate it and knead very lightly just for around 20 seconds only. Be gentle with the dough as we dont want to destroy the gluten developed therein.
Divide it into 2 parts and using one part further divide it into 6 to 7 parts. You may eye ball it or use a weighing scale. For the first timers, the ball should weigh around 60 to 70 gms. This much dough will give you 12 to 14 Pitas. Make all the balls, cover them with a kitchen towel and leave them for second proofing for about 15 minutes.
Start preheating oven along with the baking tray. Preheat it at the highest temperature in your oven, generally, 225 degrees C, for 15 minutes.
You may even heat a skillet side by side if want to bake on both.
Now, start rolling each ball just like your chapati, using dry flour.
When the oven is well preheated, sprinkle little flour on the hot baking tray and put the rolled Pita on it. Flour is sprinkled so that the Pita doesn't stick to it.
After few minutes, you will see the Pita puffing up. When it is fully puffed up and changes colour slightly then take it out. Serve immediately or let it cool on a wire rack. Similarly make all other Pitas.
Once out of the oven, stack them and wrap in a kitchen towel. Heat trapped in it will keep the pitas soft. Once cooled completely then you can wrap these in aluminium foil or a ziplock bag and keep in the refrigerator too.
At the time of serving, reheat it in microwave or on a hot skillet. Cut it from the centre, you will see the hollow pocket. Fill it with filling of your choice, preferably hummus, falafel and raw veggies like lettuce, onion etc.
- Use warm water only for kneading otherwise yeast will not activate and consequently, your dough will not rise.
- To replace instant yeast with active dry yeast, use 2/3 tsp. As 1 TSP INSTANT YEAST = 1.25 TSP ACTIVE DRY YEAST.
- You can use the same quantity of sugar in place of honey.
- In case, you end up adding too much water then add a little flour, as required.
- Rising time depends on the quantity of yeast and on the weather conditions. During summers it may rise in 45 minutes to 1 hour. Whereas in winters it may take even up to 2 hours.
- When dividing the dough into 2 parts, it’s better to roll a log and cut with a pizza cutter. Do not tear it with hands as it may destroy the gluten developed during rising. If you want to use just half the dough, then after deflating and dividing, pack the remaining half in cling film, place it in an airtight container and keep it in the refrigerator for up to 24 hours.
- You can make it with refined flour too or a combination of all the 3 flours.
You can PIN this Pita bread recipe to try later:
Trackbacks/Pingbacks