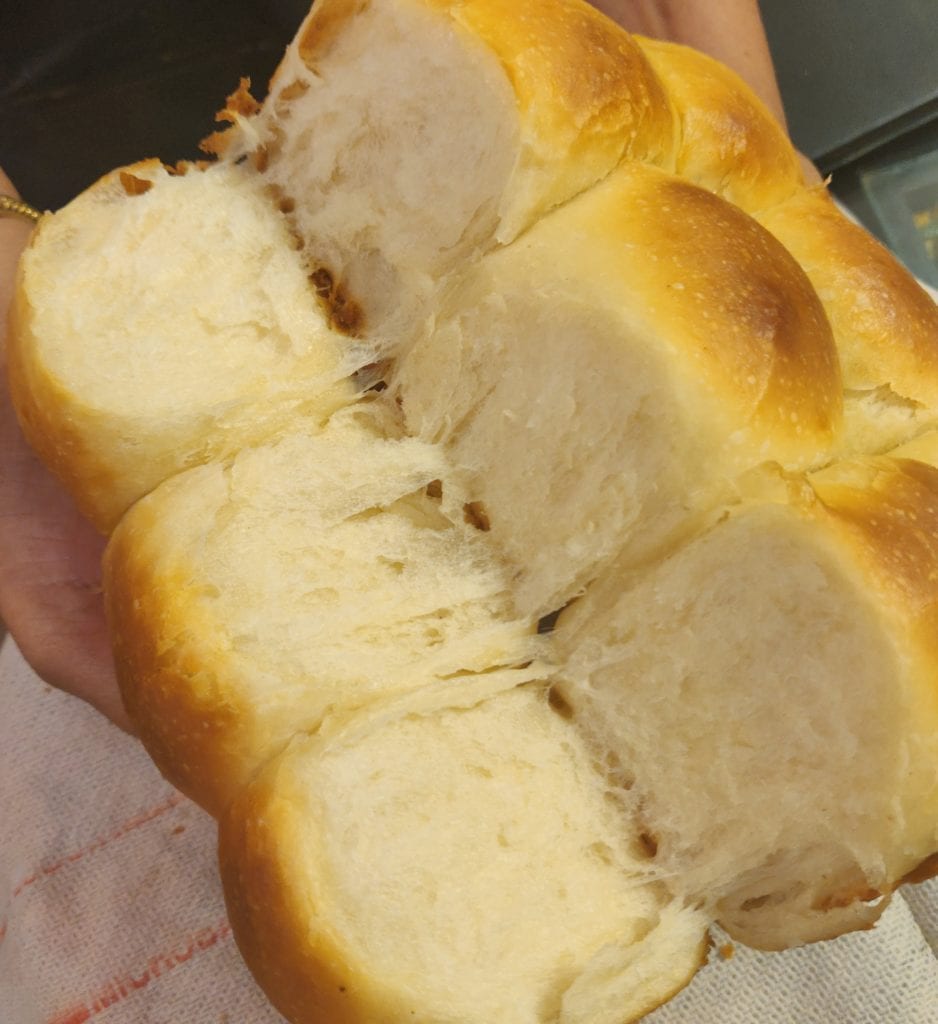
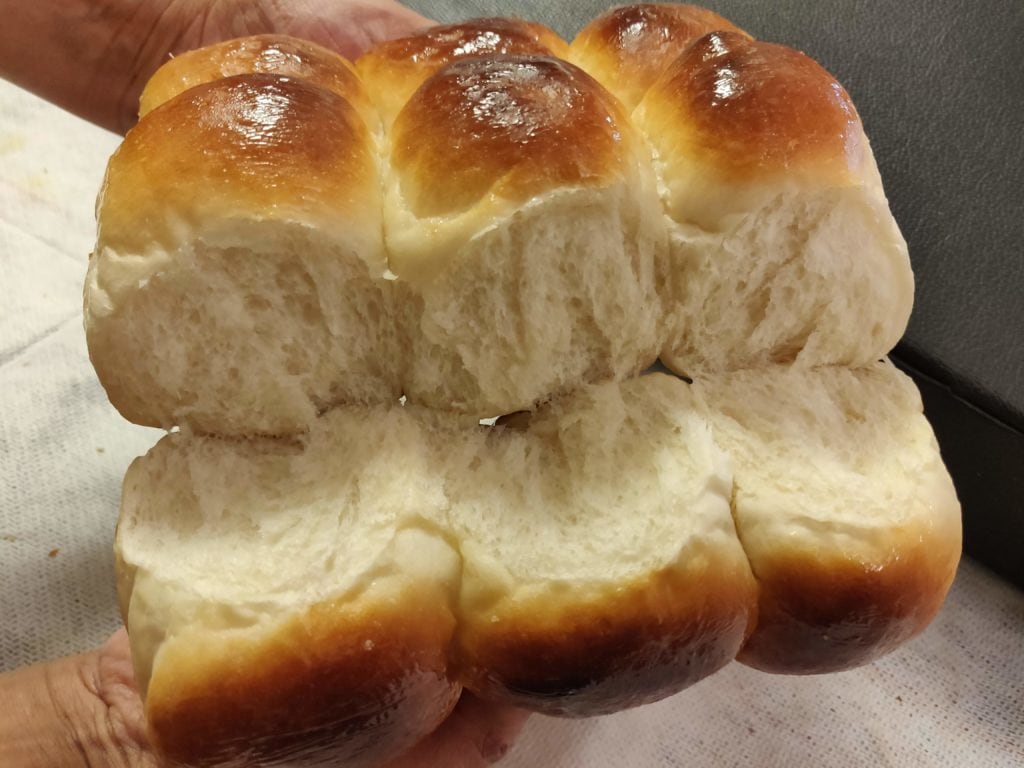
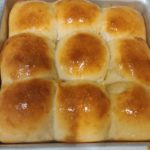
Make Pav at home that are soft and fluffy and are much better than store-bought ones. These Pav Buns or Dinner Rolls are amazing. Feather soft, perfect shape, and great in taste. Far better than the store-bought ones. The looks as well the taste is intoxicating.
Once you start having homemade Pav buns you just don't feel like buying these from the market. Step by step instructions given here will definitely help you in making these in your kitchen.
Though these are made with all-purpose flour, still these are far better than whole wheat buns from the market.

Ladi Pav At my place
This is a tried n tested Ladi Pav recipe, tried not just once but several times as this year has been a year of Ladi Pavs for me. Throughout the year, I baked these buns several times and always succeeded in surprising my guests who found it difficult to believe that these were homemade. Shape, softness, texture, taste and looks, everything just comes out perfect. The taste is in fact much better than that of store-bought ones.
Till last year, I used to make Pav bhaji only when My hubby was on tour or was not having dinner at home. This is because he never liked Pav bhaji till then. But now, he demands to have this. All because of these homemade buns. He is in just love with these.
What Do You Mean By Ladi Pav?
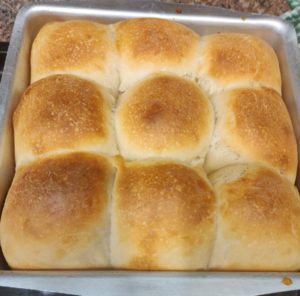
Coming over to the Ladi Pav, Ladi Pav means small rolls of bread joined together wherein you pull one roll from the slab and consume it. These are also called Pull apart buns.
These are a speciality of Mumbai and you can use the same Pav buns either for Pav Baji or Misel Pav or Vada Pav or Dabeli.
Easy recipe
And it's such a simple recipe with very few ingredients. Along with the recipe I am sharing with you certain crucial points to keep in mind while making these. Though the points are simple but can sometimes leave you confused if not known.
The recipe is more or less similar to my Basic Sandwich Bread. Almost everything is the same except for the shape.
Some other bread that you would love to try:
How to Shape Pav Buns
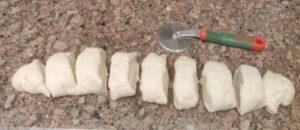
- For shaping these buns, first of all, cut the proven dough into small pieces using a pizza cutter. Refrain from stretching the balls else you may destroy the gluten developed therein.
- Usually, 3 cups flour (400 g) gives you 9 buns weighing 70 to 75 g each. Thus a single Pav bun would weigh around 70-75 grams. In the beginning, measure your balls and then shape them into roundels.
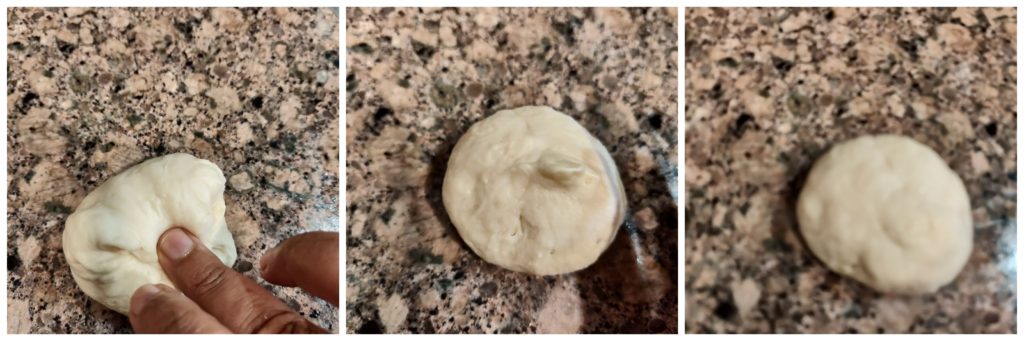
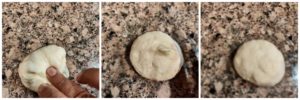
- Take a ball, fold it towards the centre from all the parts, exactly the way you make stuffed chapati. Then press it little. There shouldn't be any cracks.
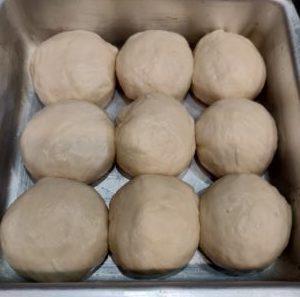
- Now invert it and keep it in a greased baking tray for second proofing.
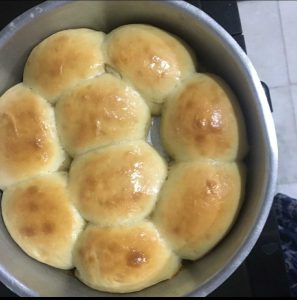
How to Keep the Pav Buns in the Baking Pan
- Always take a deep dish for baking Pav buns. This is because the buns need some support to rise. They will not form shape otherwise.
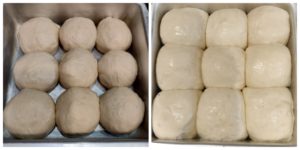
- Keep the round buns in the baking tray, side by side. You may leave little or no space in between.
- Now, while proofing, the buns will rise upwards and thus take the shape.
Step By Step Instructions To Make Pav Buns At Home
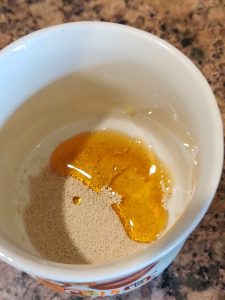
- First of all, we will activate the yeast. For this, take sugar and yeast in a cup and put lukewarm water in it.
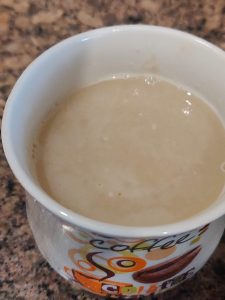
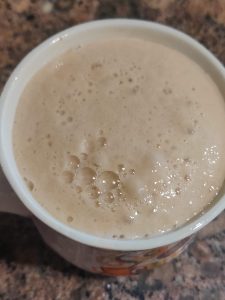
- Cover it and leave for 10 minutes till it gets bubbly and frothy.
Tip: Water should be lukewarm wherein you can put your fingers comfortably. Too hot water will kill the yeast and if not sufficiently warm then the yeast will not activate. if for any reason, your yeast doesn't bubble up and get frothy even after half an hour then discard it and start afresh.
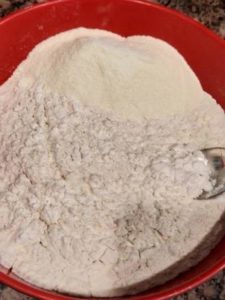
- Take all-purpose flour, milk powder and salt in a bowl and mix everything.
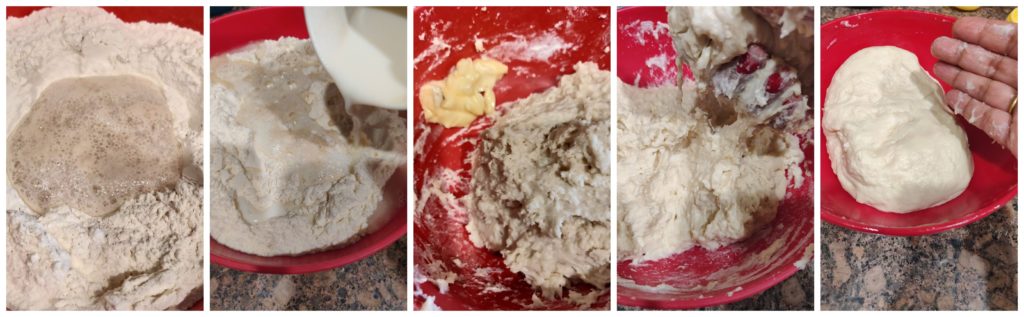
- Put yeast solution and milk in it and start kneading.
- It will be very sticky.
- Add butter and just keep on pressing the dough with the back of your hand (knuckles) and after about 7 to 8 minutes it will stop sticking.
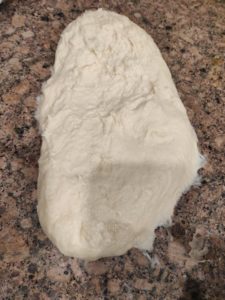
- Knead the dough for another 4 to 5 minutes by putting it on your kitchen counter.
- Stretch the dough using the heel of your hands, fold it, then again stretch.
- Soon the dough will be smooth and shiny.
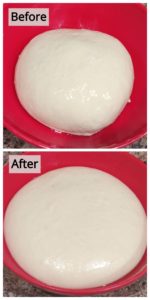
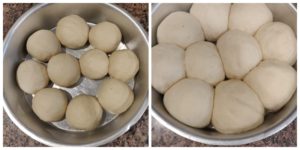
- Grease the bowl liberally, put the dough in it, invert the dough so that the top also gets oily. Cover it with a plate or lid and let it rise for an hour or so till doubles in volume. Time is just a rough guide and will depend on the weather. If too cold then it may take even longer. So, instead of time, watch your dough.
- When the dough has risen, punch it to release the gases. Knead it lightly for few seconds.
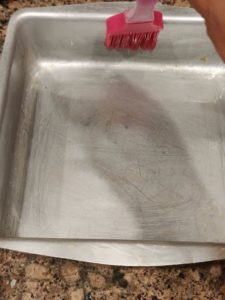
- Grease a baking pan. (Mine is 9'') Grease the bottom as well the sides of the pan.
- Divide the dough into 9 or 10 pieces.
- For this, roll it into a log and cut roundels using a pizza cutter. Normally, with this much dough, you will get 9 buns each of 70-75 gm. You may even measure these so as to keep equal-sized.
- Roll it into a ball either keeping in between your palms or on the kitchen counter. Fold from all the sides as you do while making stuffed chapati and then press it. Invert it and keep it in the baking pan.
- Cover it with a cloth and leave for second proofing till buns double in size. It normally takes 25 to 30 minutes.
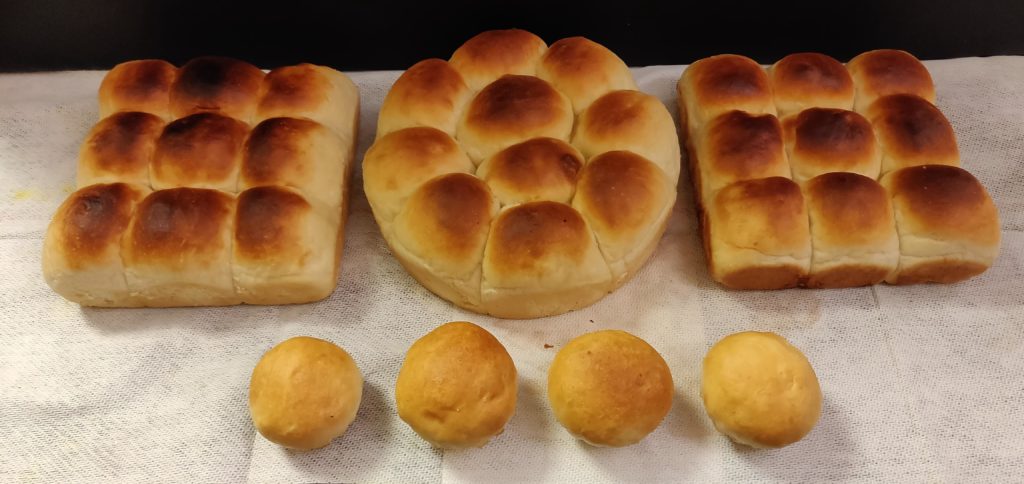
- You can use a round pan as well.
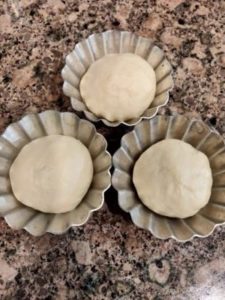
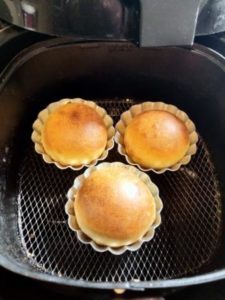
- Or in muffin moulds too. At times, when I am left with little dough then I just make mini buns like this and bake in air fryer. Alternatively, you can keep the leftover dough in the refrigerator and bake in Otg later on.
- After about 20 minutes (or more if it is cool weather), start preheating oven at 180 degrees.
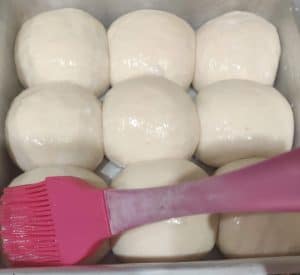
- Milk wash the buns, that is, brush milk over the buns. This is done so that they don't dry out while baking.
- Keep the baking tray in the middle rack.
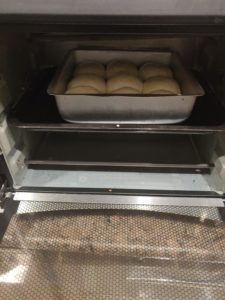
- Bake for 20 to 25 minutes or till the top gets golden brown.
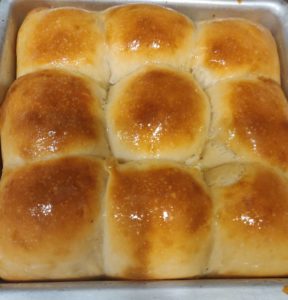
- Take out the baking tray, brush the top with butter for the glossy look.
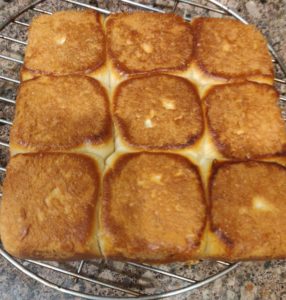
- Leave it for 5 to 10 minutes. Run a knife around the edges and invert the complete slab of buns on a wire rack.
- The bottom looks like this...
- Cover it with a damp cloth and let it cool down completely.
- Once completely cool, keep it in a zip pouch or airtight container.
- Remains good at room temperature for a day or two. Or keep in the refrigerator for longer shelf life.
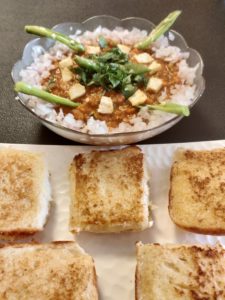
- Serve with Bhaji or make Vada Pav or Misel Pav.
Frequently Asked Questions
Q) Can I make these Pav without refined flour?
- Yes. You can make these either with whole wheat flour or with fine semolina too.
- The buns made with semolina are more or less like refined flour ones and tastes excellent. However, reduce the quantity of water when making these with semolina.
- If making with whole wheat flour then you will need more water.
Q) How to make Pav in Microwave?
Just preheat the Microwave Convection at 200 degrees C and bake your buns for 20 to 25 minutes and they will be perfect with golden brown colour.
Q) How to Bake Buns in Air fryer?
- Take out the air fryer basket and keep the buns in it for proofing. You may use a square tray or use muffin moulds as seen in the picture below.
- Preheat air fryer at 180 degrees for 5 minutes.
- Once the air fryer is preheated, keep the basket back and bake your Pav buns.
- They will be ready in just 10 to 12 minutes.
Q) Baking Pav in OTG
- Preheat your Otg at 200 degrees C for 15 minutes with both the rods ON.
- Now, keep the baking tray in the middle rack and bake using only the bottom rod for the first 15 to 17 minutes.
- Thereafter, continue baking for another 10 minutes but use both the rods so that the top gets golden brown. It may sound a little confusing but is really helpful.
- If you do not use the top rod then the top will remain white only.
- If you start baking with the top rod ON then the buns may get cracks due to direct heat. So, initial 15 minutes bake only with the bottom rod and thereafter use both the rods.
Q) How do I know that my Pav are baked fully?
Unlike cakes, skewer test is not meant for bread. Instead, we tap on the top and if it sounds hollow then this means that the Pav buns have been baked perfectly.
Q) Why my Pav buns are hard?
- This is a common problem faced by new bakers. Even after following a good recipe to T still, the end result disappoints.
- Actually, when buns are taken out of the oven, the buns are hard and have a dry top.
- How to solve this? Well, after taking out the Pav buns from the oven, brush these with melted butter and you will have beautiful looking shiny buns. Now, after inverting keep these on a wire rack and cover with a damp cloth till cools down completely. And then you will have feathery soft Pav buns. Thereafter, you can store these in a zip pouch or an airtight container.
New To Bread Baking?
If you are new to bread making then I would advise you to first go through my posts which explains the process of bread making in detail. These are Basic Steps Involved in Bread making which explains the kneading and proofing process in detail. Then there is a post about yeast titled All about Yeast which will give you all the details about yeast.
Let's Connect!
I am sure you will find this post helpful and will now easily make Pav Buns in your kitchen for your loved ones. In case, you have any query or I have missed out on something then please feel free to ask. I would love to have your views regarding this.
Thank you for reading this post. If you have liked this recipe then do let me know by leaving a comment below. Your feedback fuels my enthusiasm. You may share this post with your dear ones by clicking on the little buttons below. You may follow me on Facebook Pinterest Instagram (#samirasrecipediary) too. for latest recipe updates. Thank you!
Ladi Pav
Homemade Ladi Pavs are just unparalleled. Step by step pictures given here will help you make these buns with ease in your kitchen.
- 3 Cups (375 g)All-Purpose Flour
- 3 Tablespoon Milk Powder
- 3/4 teaspoon Instant Yeast
- 1 Tablespoon Sugar
- 1 teaspoon Salt
- 1 Tablespoon Butter, Softened plus 1 tsp for Brushing
- 2 Tablespoon Oil
- 3/4 Cup Water (lukewarm)
- 1/2 Cup Milk, at room temperature plus 1 tsp for Milk Wash
First of all, we will activate the yeast. For this, take sugar and yeast in a cup and put lukewarm water in it. Cover it and leave for 10 minutes till it gets bubbly and frothy. Water should be lukewarm wherein you can put your fingers comfortably. Too hot water will kill the yeast and if not sufficiently warm then the yeast will not activate. If the water doesn't get frothy even after half an hour then discard it and start afresh.
- Take all purpose flour, milk powder and salt in a bowl and mix everything.
- Put yeast water and milk in it and start kneading. It will be very sticky. Add butter and just keep on pressing the dough with the back of your hand (knuckles) and after about 7 to 8 minutes it will stop sticking.
- Put the dough on your kitchen counter and knead for another 4 to 5 minutes. Stretch the dough using the heel of your hands, fold it, then again stretch. Soon the dough will be smooth and shiny.
Grease the bowl liberally, put the dough in it, Flip it so that both the sides of the dough are properly greased. Cover it with a plate or lid and let it rise for an hour or so till doubles in volume. Time is just a rough guide and will depend on the weather. If too cold then it may take even longer. So, instead of time, watch your dough.
Once the dough is double, do the ripe test. Insert two fingers in the dough to see that the indentations remain and rebound slowly. Punch it to release the gases. Knead it lightly for few seconds.
- Grease a baking pan. Grease the bottom as well the sides of the pan.
Roll it into a log and cut roundels using a pizza cutter. You may even measure these so as to keep equal sized. With this much flour, you will get 9 buns.
- Roll it into a ball either keeping in between your palms or on the kitchen counter. Fold from all the sides as you do while making stuffed chapati and then press it. Invert it and keep it in the baking pan.
- Cover it with a cloth and leave for second proofing till buns double in size. It normally takes 25 to 30 minutes.
- After about 20 minutes (or more if it is cool weather), start preheating oven at 180 degrees.
- Milk wash the buns, that is, brush milk over the buns. This is done so that they don't dry out while baking.
- Bake for 20 to 25 minutes or till the top gets golden brown.
Take out the baking tray, leave it for 5 to 10 minutes. Brush the top with butter for the glossy look.
Run a knife around the edges and invert the complete slab of buns on a wire rack.
- Cover it with a damp cloth and let it cool down completely.
- Once completely cool, keep it in a zip pouch or airtight container.
- Remains good at room temperature for a day or two. Or keep in the refrigerator for longer shelf life.
- Serve with Bhaji or make Vada Pav or Misel Pav.
Step by step pictures given in this post will help you in getting a clear understanding as to how to make these buns.
- Kneading is the key to have soft buns. The dough will be extremely sticky in the beginning but with continuous kneading for 8 to 10 minutes, it will be manageable.
- Always take a deep baking pan so that the Pav can rise fully and beautifully.
- Milk powder is optional and can be avoided if you do not want to use it. Replace it in equal quantity with all-purpose flour.
Testimonials
By Sarika Anand
Hi Samira,
Such a simple and perfect recipe…my first successful attempt at baking bread…loved it…😘😘
Hi Sarika, thanks for your lovely feedback dear.
Hi Sameera
Can I Half the recipe?
Thank you
Hi Shivani,
Yes, you can half or double it. Just half/double all the Ingredients.
Proofing time will remain the same. Baking time will reduce marginally (not half).
I tried out for the first time ever and it came out wonderful. Thanks a lot Samira Ma’am For detailed recipe. Each minute tip is given. Very useful tip regarding oven settings is mentioned. I followed it and because of this tip I could bake well. God bless you ma’am. Much Regards.
I am really glad that your buns came out perfect. Long written posts seems worthwhile with such wonderful feedbacks. Thanks a lot for your feedback as well as for your Blessings☺️
Came out delicious…perfect…keep going, Samira… I am going to use your blog as my base for cooking from now on…measures are good…
Thanks a lot for trying and sharing your wonderful feedback. Lovable comments like this really fuel my energy and keeps me motivated. Thankssss dearie.
Samira Ma’am, please guide me that I have 1 cup= 250 ml. You have taken half cup milk and three fourth water. So first of all, what was the size of your measuring cup. Secondly, apf was 375 gms. So, can you please guide me on number of cups do I have to take Maida in a cup of 250 ml? Thanks in advance
Hi Ruchi, my cup measures 240 ml. And total liquid used is 1+1/4 cup. But it can vary by 1 or 2 tablespoons.
You can take 2+3/4 cups flour. Yeast, salt, sugar, milk powder will remain the same.But I suggest, you measure using your cup only and knead like normal flour.
Thank you ma’am for prompt response 😊. Will try out soon 👍
Thank you mam for the detailed instruction. Tried as per ur instruction. Came out well . The only thing is the upper crust became dark in just 14 min . Microwave convection .
Came out super soft tasty pavs! Thank you so much for the detailed recipe with all the tips and tricks, and most importantly, very few ingredients! 🙏🏼
That’s Great! Thank you for sharing your lovely feedback. Would have loved to see the pics.
I’m not sure how to share picture here 😞
Not here, but you can share it on Instagram and tag me there, #samirasrecipediary
👍🏼
Why the paper dry while baking …i removed it and cooled it …took a bite or was dry ..any idea why
Which paper you are talking of? The parchment paper? I have not used in this but parchment paper does dry out while baking.
You mean the bun was dry? There can be 2 reasons for that. First is over baked and the other is that the dough was too tight.
Beautiful buns. Samira . They beat the soft buns sold in Pune.
What a wonderful compliment! Thank you so much dear. You made my day!