Make Moong Sprouts at home easily and without using a sprout maker.
Sprouts are the ultimate source of protein, especially for vegetarians and vegans. Here I am going to share with you step-by-step instructions showing how to make sprouts at home in 36 hours (more in winters) that too without using a sprout maker.
In this post, I am using moong beans but using the same method you can sprout any grain be it Kala chana or Chickpeas or alfalfa, buckwheat, barley, etc. Even millets, like Ragi, Jowar can be sprouted beautifully.
Read: How to Make Ragi Sprouts
Before we jump to see how the sprouts are made, wouldn't it be better if we understand a little about sprouts?
Sprouts are indeed good for health. They are a storehouse of proteins and antioxidants, good for weight watchers, for diabetics, and for heart patients too. It is recommended to have sprouts daily for the overall health of the body
Soaking makes the grain more digestible, no doubt but sprouting does much more than that.
What Are Sprouts?
First of all, let us understand what are sprouts? So, Sprouts are seeds that have been allowed to germinate into young plants. Thus, sprouting converts whole grains into a living food that has even more nutrients and these nutrients are easily absorbed by the body. You can sprout any whole grain like Green Gram (Moong), Chickpeas (Kabuli Chana), Black Gram (Kala Chana), Soybean, Ragi etc.
1/2 cup of (100 g) Moong (Green Gram) generates 2.5 (250 g) Cups of Moong Sprouts
How to make Sprouts?
A. Soaking:
- The first and foremost thing in sprouting is soaking grains. I have used Green Gram here, follow the same method for other whole grains too.
- Use filtered water for soaking as the lentils are going to drink this water.
- Soak them for 8 to 10 hours till the grains are double in size. If the grains are not fully soaked then they do not germinate well. So, don't be in a hurry. Soak them well, better if overnight. If you are short of time then soak these in warm water. Your job will be done in almost half the time.
- Must Read: Why To Soak Beans?
B. Rinsing
- Once they are properly soaked, rinse them well in fresh water and drain the water.
- Then keep them in a strainer for about 5 minutes so that all extra water also drains out.
- One minute, do not throw this water but reserve it. It is excellent for your plants' health. Put a little of it in all your plants and see the magic, of course with time.
C. Sprouting
- After soaking and rinsing now starts the sprouting process. For this, different people use different methods. Some people use muslin cloth. Even sprout makers are there in the market. Personally, I do not like to use any such fancy equipment. Why add unnecessary gadgets when we can do without them?
- Just take a big bowl. Transfer your soaked and drained sprouts to this bowl, cover with a plate and keep it in some warm and dark place. I prefer keeping this container in the microwave or Otg.
- This is because grains require a warm and dark place to germinate and the microwave provides it with the perfect environment.
- Tip: Do not try to sprout the beans in the sunlight, they will get dark in color.
- Sprouting will start after 8 hours approximately, depending on the weather. Now, all you have to do is that twice a day, once in the night then in the morning, remove the plate, toss the grains and make them wet by sprinkling little water.
- Cover with a plate and again back to their closed space. You need to make them wet because if too dry then even then they will not germinate. Do not put excess water else it may catch fungus. If you happen to add more water then put them in a strainer and remove excess water. Just keep them wet, that's it.
- After 24 hours (in summers), you will have young sprouts. For longer ones, keep like this for one more day.
- Once fully sprouted, wash them nicely and then after draining all excess water use it or transfer these in an airtight container and keep it in the refrigerator. Remains good for 4 to 5 days.
Benefits
- The process increases nutrient levels. Sprouts are richer in protein, folate, magnesium, phosphorus, manganese and vitamins B, C, and K than un-sprouted plants.
- Increases the protein content
- Makes it more digestible.
- Contains lower levels of anti-nutrients, making it easier for your body to absorb all the nutrients they contain.
- Great source of antioxidants and other beneficial plant compounds.
- Fibre content is increased
- Reduces the amount of gluten found in grains, which makes them easier to digest.
- Eating sprouts may increase “good” HDL cholesterol and reduce total and “bad” LDL cholesterol levels and is thus good for the heart.
Read about the benefits in detail at www.healthyflour.com & www.healthline.com I am sure after reading about the benefits of sprouts you will add them to your diet more religiously. This is because of the simple reason that we all need continuous reminders from time to time. So, if you have been ignoring eating sprouts for whatever reason, then no more of it. Immediately soak grains and start the process of sprouting.
Step By Step Instructions
(I am showing here how to make green gram sprouts but the same method applies for making sprouts from any other seeds)
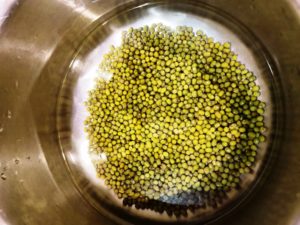
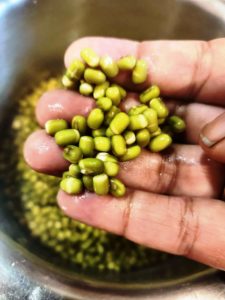
- Take mung beans, clean them and wash them in running water at least 2 to 3 times. I started on Friday night.

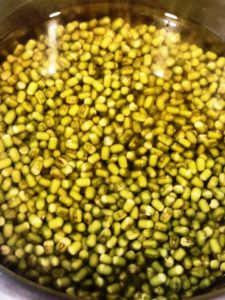
- Soak them in enough water for 8 to 10 hours, preferably overnight. I soaked them on Friday night at around 10 pm.
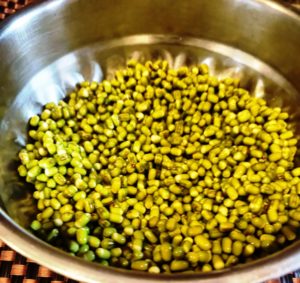
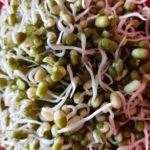
- After soaking for 10 hours: The beans, once properly soaked get double in size, as shown in the picture. Saturday morning looked like this.
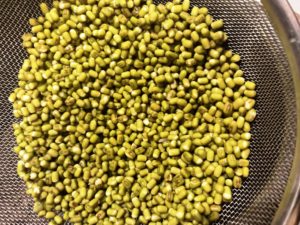
- Keep the beans in the strainer for around 15 minutes so that all the excess water drains out. Reserve the water and use it for watering your plants, as this water is full of nutrients (but only for plants)
- Transfer the rinsed beans to a container and cover it with a plate.
- Keep the covered container in some dark and warm place, like inside a microwave/Otg or kitchen cabinet.
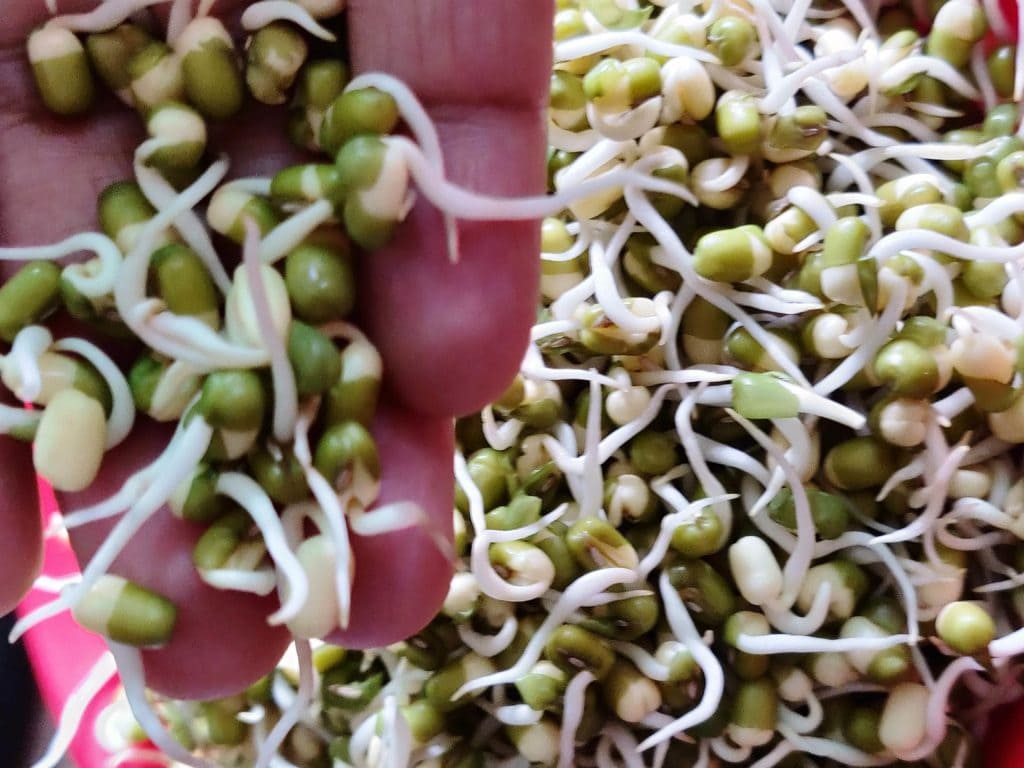
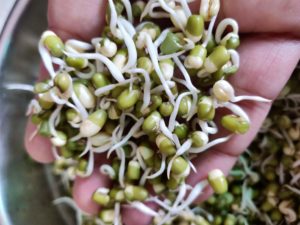
- After the next 12 hours: Beans begin to sprout, as shown here. Saturday night looked like this.
- Toss them, sprinkle 1 teaspoon water. Again cover it and return these to their closed corner.
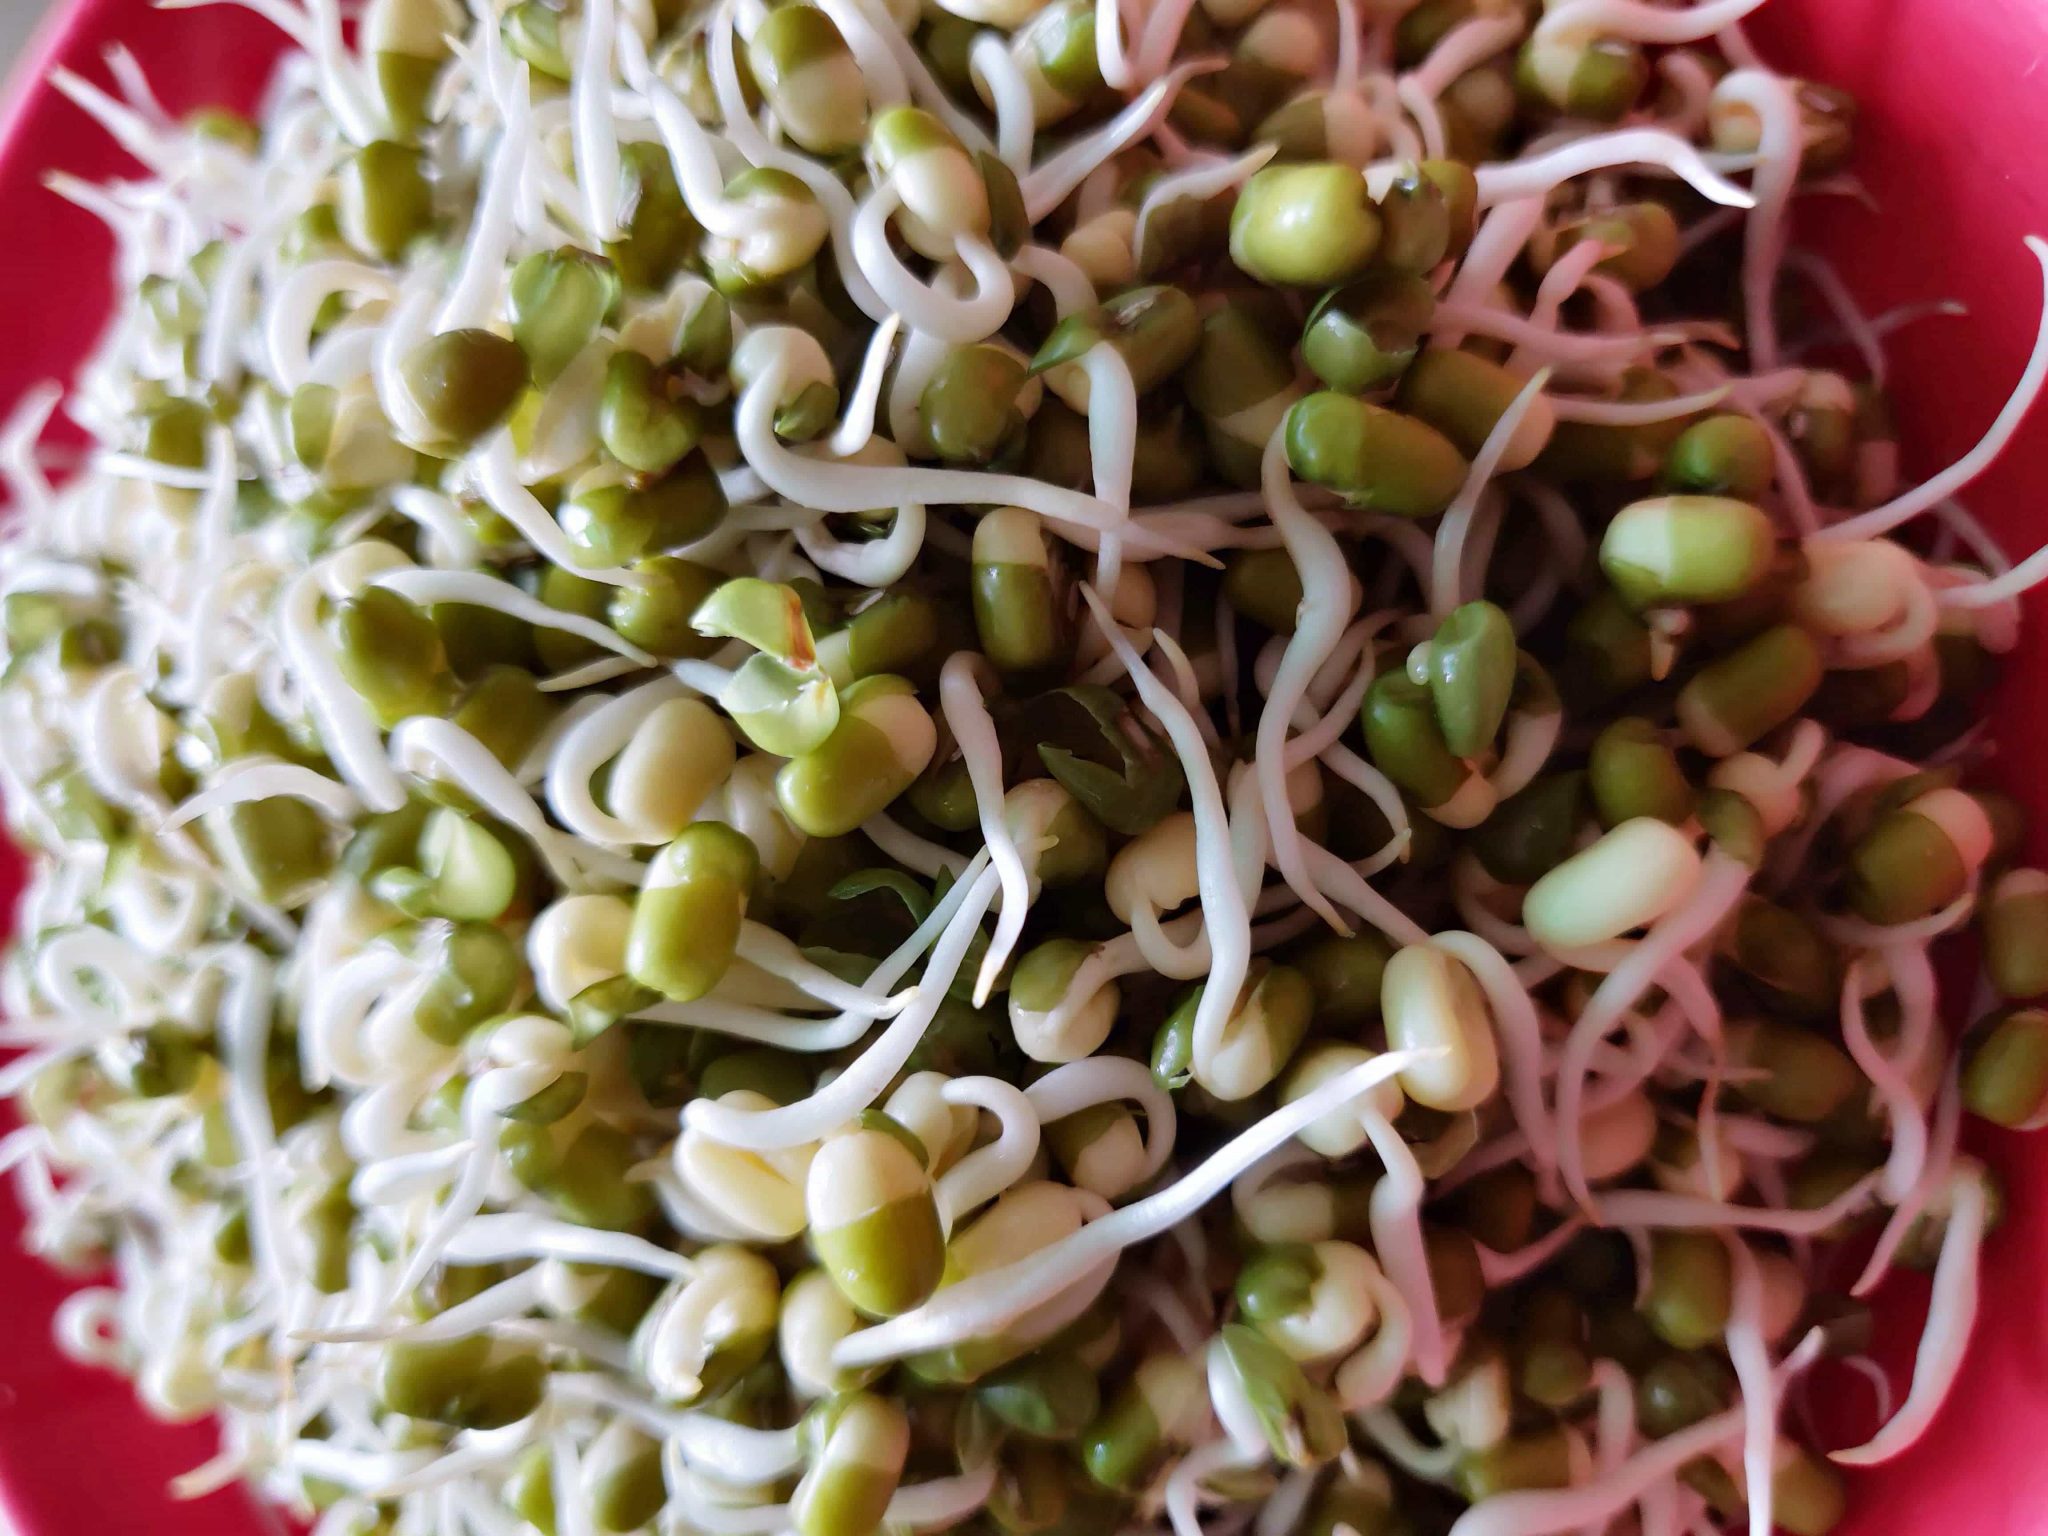
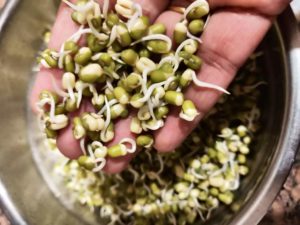
- After the next 12 hours: The sprouts are ready. As you touch them these will be warm because of the germination process. Sunday morning looked like this.
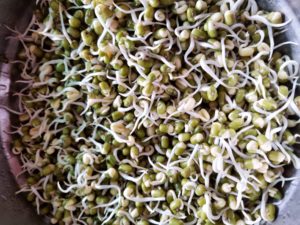
- Use them or store them in an airtight container in the refrigerator.
FAQs
Q What are the different ways of consuming sprouts?
- Make sprout salad.
- Steam sprouts and add spices of your choice.
- Add these to your soups and stews.
- Mix these into shakes/smoothies.
- Add these to your rice preparations.
- Mix them in your cutlets/croquettes mixture.
Q) Should sprouts be eaten raw or cooked?
- Sprouts can be eaten raw or cooked. But as per studies, raw sprouts contain bacteria and are thus prone to food poisoning.
- When comes to cooking then you can cook them fully or partially. If you want to have fully cooked and very soft sprouts then best is to pressure cook them for a whistle.
- However, for partial cooking, keep them in a microwave oven for a minute or so. Or keep some water in a pan and put to a boil. when the water starts boiling keep a steel strainer on it and add the sprouts in the strainer. Cover the strainer with a plate. Sprouts will be cooked in the steam coming from the boiling water.
- You may choose whichever method suits you the best.
Q) What are the simple steps to make sprouts at home?
- Soak the mung beans (or any other) well.
- Keep in a dark and warm place.
- No excess water in the bowl containing beans
- Tossing after every 8 to 10 hours.
Q) Sprouts are easily available in the vegetable markets, then why should I make my own?
Though sprouts are now being sold in the market also but its better to make your own because of following reasons:
- the process is very easy and hassle-free
- you are sure of the quality of beans as well as of the water that is being used to sprout them
Q) What all grains can I sprout?
You can sprout many grains like green gram, chickpeas, black gram, alfalfa, buckwheat, barley, etc. In fact, millets can also be sprouted, like Ragi, Jowar, Bajra.
Let's Connect!
I am sure now you will make healthy sprouts easily and will include these in your diet at least thrice a week. I would love to have your comments and feedback as you know your feedback fuels my enthusiasm to post more good content. If you post your creation’s pic on Instagram then remember to tag me #samirasrecipediary.
Let’s connect on Facebook, Pinterest, Instagram (#samirasrecipediary) too.
How To Make Moong Sprouts
Detailed post of how to make sprouts at home
- 1/2 Cup (100 g) Green gram (moong)
- Clean and wash the green gram 3 to 4 times in running water.
Soak them in water for at least 8 to 10 hours till gets double in size. Take enough water as they absorb a lot of it. If, in between, you find that water has been soaked fully then add more water. If the grains are not fully soaked then they do not germinate well. So, don't be in a hurry. Soak them well, better if overnight.
After 8 hours, put the lentils in a strainer and drain all the excess water. Use this water for watering your plants as it is high in nutrients.
Now take a big bowl. Once the water has been drained, transfer your soaked and drained sprouts in this bowl, cover with a plate and keep them in some warm and dark place. I prefer keeping this container in the microwave or Otg (of course, without running them). This is because grains require a warm and dark place to germinate and microwave provides it with the perfect environment.
Now, all you have to do is that twice a day, once in the night then in the morning, toss the grains and if completely dried out then make them wet by sprinkling little water. Cover with the plate and again back to their closed space. You need to make them wet because if too dry then even then they will not germinate. Do not put excess water else it may catch fungus. If you happen to add more water then put them in a strainer and remove excess water. Just keep them wet, that's it.
- After 24 hours (in summers), you will have young sprouts. For longer ones, keep like this for one more day.
Once fully sprouted, transfer these in an airtight container and keep it in the refrigerator. Remains good for 4 to 5 days. Now, whenever you want, take little and use.
1/2 cup (100 g) green gram produces 2.5 cups (250 g) of sprouts in approximately 36 hours during summers.
For step by step images, check the main post.
- If short of time then soak in warm water, your job will be done in almost half the time.
- Use drinking water for soaking lentils as these lentils are going to drink this water.
- Ensure that there is no water in the container while sprouting else they will catch fungus. Similarly, while storing in the refrigerator, they should be completely dry.
- In winters the process takes more time, approximately one day extra.
- Follow the same method for sprouting any other whole grain like Chickpeas, Black Gram, soybean, wheat etc.
Healthy Living…Happy Living…
Trackbacks/Pingbacks